Whether you're chasing cash back, travel rewards, or a 0% intro APR to manage debt, the right credit card can go a long way.
Our team has sifted through hundreds of offers to highlight the top picks this month -- the ones that deliver real value where it counts. From generous welcome bonuses to everyday perks, these are the cards we'd recommend to friends, family -- and yes, we use many of them ourselves.
If you're short on time, here's a quick list of some of our favorite cards by category:
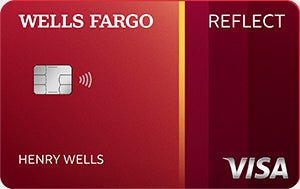
0% intro APR: We have not come across a card with a longer interest-free period than the Wells Fargo Reflect® Card (see rates and fees), which offers an incredible 0% intro APR period of 21 months from account opening on both purchases and balance transfers. (After the intro period, the go-to 17.24%, 23.74%, or 28.99% Variable APR applies.) You won't get rewards with this card, but it's tough to beat for avoiding interest for the longest possible time – and there is no annual fee. Learn more
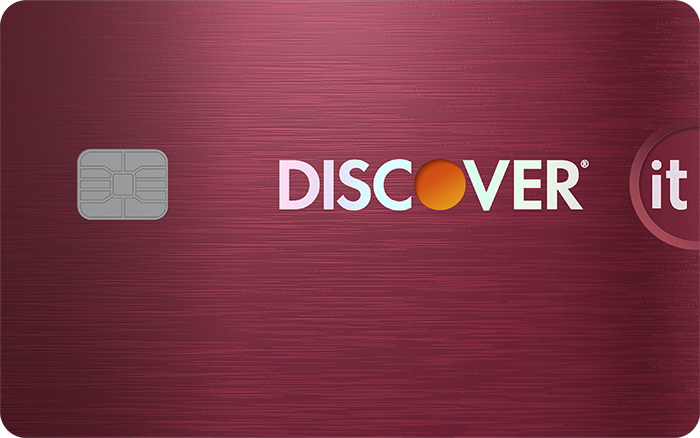
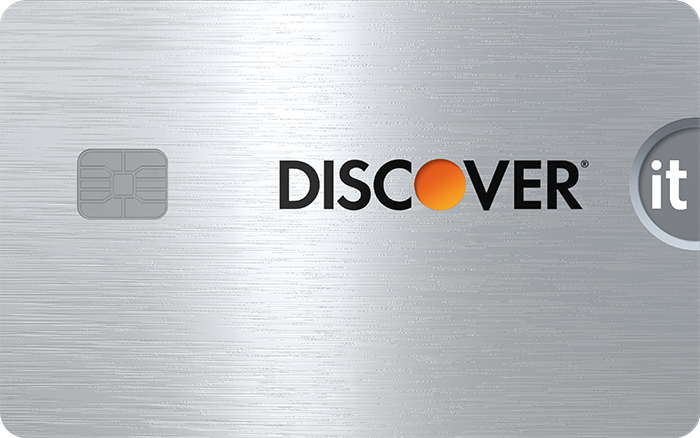
Cash back: The Discover it® Cash Back offers one of the highest cash back rates that we've seen. And what makes this card especially lucrative is the Unlimited Cashback Match -- Discover automatically matches all of the cash back new cardholders have earned at the end of the first year. Plus, you'll get a solid 15 months of intro APR on purchases and balance transfers, and all for no annual fee. (After the intro period, the go-to 18.24% - 27.24% Variable APR applies.) There's a 3% intro balance transfer fee, up to 5% fee on future balance transfers (see terms)*. Learn more
- Our team of experts reviewed over 260 credit cards
- We evaluate all credit cards across the same 4 key criteria: value, welcome experience, fees, and perks
- Our credit card ratings are never influenced by our advertising partners
- If we wouldn't recommend an offer to a close family member, we won't recommend it to you
Our aim is to maintain a balanced best-of list featuring top-scoring credit cards from reputable brands. 'Best for' category selections on this page are determined by our editors, and a single card may be recognized in multiple categories.
Best credit cards of July 2025
Good/Excellent (670-850)
Intro APR 0% intro APR for 21 months from account opening on purchases and qualifying balance transfers
Purchases: 0% intro APR, 21 months from account opening
Balance Transfers: 0% intro APR, 21 months from account opening on qualifying balance transfers
Regular APR
17.24%, 23.74%, or 28.99% Variable APR
Rewards
N/A
Annual Fee
$0
Welcome Offer
N/A
-
This no-frills card is a solid choice if your priority is to avoid credit card interest for as long as possible. It offers an incredible intro APR. The balance transfer fee (5%; $5 min.) is higher than some cards, but if you want an equally long intro APR on purchases, this card is hard to beat.
Read Full Review -
- Long 0% intro APR offer
- No annual fee
- Cellphone protection
- Balance transfer fee
- Foreign transaction fee
- No rewards program
-
- Apply Now to take advantage of this offer and learn more about product features, terms and conditions.
- 0% intro APR for 21 months from account opening on purchases and qualifying balance transfers. 17.24%, 23.74%, or 28.99% variable APR thereafter; balance transfers made within 120 days qualify for the intro rate, BT fee of 5%, min: $5.
- $0 annual fee.
- Up to $600 of cell phone protection against damage or theft. Subject to a $25 deductible.
- Through My Wells Fargo Deals, you can get access to personalized deals from a variety of merchants. It's an easy way to earn cash back as an account credit when you shop, dine, or enjoy an experience simply by using an eligible Wells Fargo credit card.
Good/Excellent (670-850)
Intro APR
Purchases: 0%, 15 months
Balance Transfers: 0%, 15 months
Regular APR
18.24% - 27.24% Variable APR
Rewards Earn 5% cash back on everyday purchases at different places you shop each quarter like grocery stores, restaurants, gas stations, and more, up to the quarterly maximum when you activate. Plus, earn unlimited 1% cash back on all other purchases.
1% - 5% Cashback
Annual Fee
$0
Welcome Offer INTRO OFFER: Unlimited Cashback Match for all new cardmembers–only from Discover. Discover will automatically match all the cash back you’ve earned at the end of your first year! There’s no minimum spending or maximum rewards. You could turn $150 cash back into $300.
Discover will match all the cash back you’ve earned at the end of your first year.
-
We think this card has among the highest cash back potential for cards with no annual fee. The key is the Unlimited Cashback Match — Discover automatically matches all the cash back new cardholders have earned at the end of the first year. That cash back can seriously add up when you earn 5% cash back on rotating bonus categories (when you activate them, up to the quarterly maximum) and 1% on other purchases.
Read Full Review -
- Rotating bonus categories
- Welcome bonus offer
- Great intro APR offer
- No annual fee
- No foreign transaction fee
- No fixed bonus categories
-
- INTRO OFFER: Unlimited Cashback Match for all new cardmembers–only from Discover. Discover will automatically match all the cash back you’ve earned at the end of your first year! There’s no minimum spending or maximum rewards. You could turn $150 cash back into $300.
- Earn 5% cash back on everyday purchases at different places you shop each quarter like grocery stores, restaurants, gas stations, and more, up to the quarterly maximum when you activate. Plus, earn unlimited 1% cash back on all other purchases.
- Redeem your rewards for cash at any time.
- Apply and you could get a decision in as little as 60 seconds. No annual fee.
- Start shopping and earning rewards in minutes with your digital card, before your physical card arrives in the mail, if eligible.
- Get a 0% intro APR for 15 months on purchases. Then 18.24% to 27.24% Standard Variable Purchase APR applies, based on credit worthiness.
- Terms and conditions apply.
Good/Excellent (670-850)
Intro APR
Purchases: 0%, 12 months on Purchases
Balance Transfers: 0%, 21 months on Balance Transfers
Regular APR
18.24% - 28.99% (Variable)
Rewards
N/A
Annual Fee N/A
$0
Welcome Offer There is an intro balance transfer fee of 3% of each transfer (minimum $5) completed within the first 4 months of account opening. After that, your fee will be 5% of each transfer (minimum $5).
Long intro balance transfer APR
-
This is one of our favorite cards for balance transfers. It has 0% intro APR for 21 months on balance transfers and a discounted balance transfer fee for the first four months. That combo makes it one of the most generous balance transfer offers we’ve seen. But it doesn't have much ongoing value after the intro 0% APR period ends.
Read Full Review -
- Great intro APR
- No annual fee
- No late fees
- No penalty APR
- Choose your own payment date
- No rewards
- Foreign transaction fee
-
- No Late Fees, No Penalty Rate, and No Annual Fee... Ever
- 0% Intro APR on balance transfers for 21 months and on purchases for 12 months from date of account opening. After that the variable APR will be 18.24% - 28.99%, based on your creditworthiness. Balance transfers must be completed within 4 months of account opening.
- There is an intro balance transfer fee of 3% of each transfer (minimum $5) completed within the first 4 months of account opening. After that, your fee will be 5% of each transfer (minimum $5).
- Stay protected with Citi® Quick Lock
Good/Excellent (670-850)
Intro APR
Purchases: N/A
Balance Transfers: N/A
Regular APR
19.99% - 29.24% (Variable)
Rewards Earn unlimited 2X miles on every purchase. Earn unlimited 5X miles on hotels, vacation rentals, and rental cars booked through Capital One Travel, where you'll get Capital One's best prices on thousands of trip options.
2X-5X miles
Annual Fee
$95
Welcome Offer 75,000 Miles once you spend $4,000 on purchases within 3 months from account opening
75,000 Miles
-
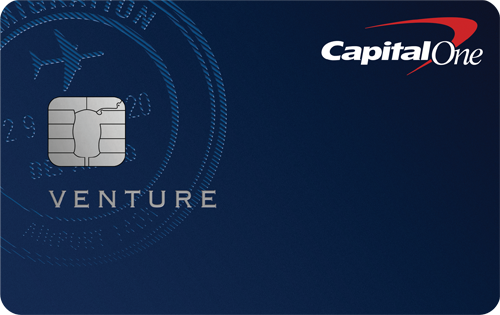
This is one of our top travel credit cards overall, because of its highly lucrative, yet dead simple rewards program. Earn unlimited 2X miles on every purchase and use them to get reimbursed for any travel purchase — or to book a trip through Capital One Travel. TSA PreCheck® credit and the opportunity to earn a massive sign-up bonus (equal to $750 in travel) make this credit card one of the best travel companions.
-
- Excellent sign-up bonus
- Unlimited miles on purchases
- Travel credit
- Multiple ways to use miles
- No foreign transaction fee
- Annual fee
- No 0% intro APR offer
- Low cash back redemption value
-
- Enjoy a one-time bonus of 75,000 miles once you spend $4,000 on purchases within 3 months from account opening, equal to $750 in travel
- Earn unlimited 2X miles on every purchase, every day
- Earn 5X miles on hotels, vacation rentals and rental cars booked through Capital One Travel, where you'll get Capital One's best prices on thousands of trip options
- Miles won't expire for the life of the account and there's no limit to how many you can earn
- Receive up to a $120 credit for Global Entry or TSA PreCheck®
- Use your miles to get reimbursed for any travel purchase—or redeem by booking a trip through Capital One Travel
- Enjoy a $50 experience credit and other premium benefits with every hotel and vacation rental booked from the Lifestyle Collection
- Transfer your miles to your choice of 15+ travel loyalty programs
Good/Excellent (670-850)
Intro APR 0% intro APR for 12 months from account opening on purchases and qualifying balance transfers
Purchases: 0% intro APR, 12 months from account opening
Balance Transfers: 0% intro APR, 12 months from account opening on qualifying balance transfers
Regular APR
19.24%, 24.24%, or 29.24% Variable APR
Rewards Earn unlimited 2% cash rewards on purchases.
2% cash rewards
Annual Fee
$0
Welcome Offer Earn a $200 cash rewards bonus after spending $500 in purchases in the first 3 months.
$200 cash rewards
-
This card’s unlimited 2% cash rewards on purchases is the highest we’ve seen for a flat-rate rewards card with no annual fee. It also has an incredibly easy-to-earn $200 welcome bonus and a decent intro APR offer. We simply haven’t come across this combination of top perks in one card before.
Read Full Review -
- Unlimited 2% cash rewards
- Long 0% intro APR offer
- Generous cash rewards welcome bonus
- No annual fee
- Cellphone protections
- No bonus categories
- Foreign transaction fees
- Balance transfer fee
-
- Apply Now to take advantage of this offer and learn more about product features, terms and conditions.
- Earn a $200 cash rewards bonus after spending $500 in purchases in the first 3 months.
- Earn unlimited 2% cash rewards on purchases.
- 0% intro APR for 12 months from account opening on purchases and qualifying balance transfers. 19.24%, 24.24%, or 29.24% variable APR thereafter; balance transfers made within 120 days qualify for the intro rate and fee of 3% then a BT fee of up to 5%, min: $5.
- $0 annual fee.
- No categories to track or remember and cash rewards don’t expire as long as your account remains open.
- Find tickets to top sports and entertainment events, book travel, make dinner reservations and more with your complimentary 24/7 Visa Signature® Concierge.
- Up to $600 of cell phone protection against damage or theft. Subject to a $25 deductible.
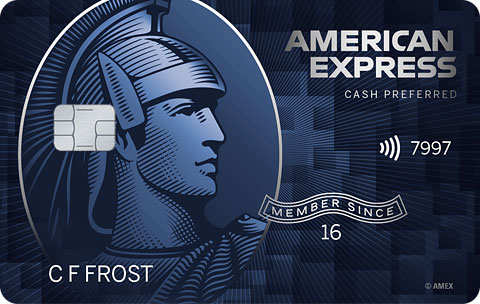
On American Express' Secure Website.
Terms apply
On American Express' Secure Website.
Terms apply
Good/Excellent (670-850)
Intro APR
Purchases: 0% on purchases, 12 months
Balance Transfers: 0%, 12 months
APR
20.24%-29.24% Variable
Rewards 6% Cash Back at U.S. supermarkets on up to $6,000 per year in purchases (then 1%). 6% Cash Back on select U.S. streaming subscriptions. 3% Cash Back at U.S. gas stations. 3% Cash Back on transit (including taxis/rideshare, parking, tolls, trains, buses and more). 1% Cash Back on other purchases. Cash Back is received in the form of Reward Dollars that can be redeemed as a statement credit or at Amazon.com checkout.
1%-6% Cash Back
Annual Fee
$0 intro annual fee for the first year, then $95.
Welcome Offer Earn a $250 statement credit after you spend $3,000 in eligible purchases on your new Card within the first 6 months.
$250
-
This card is a smart choice for earning top-tier rewards on everyday purchases. It features a market-leading rate of a whopping 6% cash back at U.S. supermarkets (on up to $6,000 per year), 6% on select U.S. streaming services, and 3% on U.S. gas and transit. Plus, there’s a strong welcome offer: Earn a $250 statement credit after spending $3,000 in the first 6 months. With 0% intro APR on purchases and balance transfers for the first 12 months and $0 annual fee for the first year (then $95), it’s one of our favorite credit cards for a reason. Terms apply.
Read Full Review -
- Big welcome offer
- U.S. supermarkets rewards
- U.S. gas stations rewards
- Streaming subscription rewards
- Annual fee
- Foreign transaction fee
-
- Earn a $250 statement credit after you spend $3,000 in eligible purchases on your new Card within the first 6 months.
- $0 intro annual fee for the first year, then $95.
- Buy Now, Pay Later: Enjoy $0 intro plan fees when you use Plan It® to split up large purchases into monthly installments with a fixed fee. Pay $0 intro plan fees on plans created during the first 12 months from the date of account opening. Plans created after that will have a monthly plan fee up to 1.33% of each eligible purchase amount moved into a plan based on the plan duration, the APR that would otherwise apply to the purchase, and other factors.
- Low Intro APR: 0% intro APR on purchases and balance transfers for 12 months from the date of account opening. After that, your APR will be a variable APR of 20.24% - 29.24%.
- 6% Cash Back at U.S. supermarkets on up to $6,000 per year in purchases (then 1%).
- 6% Cash Back on select U.S. streaming subscriptions.
- 3% Cash Back at U.S. gas stations and on transit (including taxis/rideshare, parking, tolls, trains, buses and more).
- 1% Cash Back on other purchases.
- Cash Back is received in the form of Reward Dollars that can be redeemed as a statement credit or at Amazon.com checkout.
- $84 Disney Bundle Credit: With your enrolled Blue Cash Preferred® Card, spend $9.99 or more each month on an auto-renewing Disney Bundle subscription, to receive a monthly statement credit of $7. Valid only at Disney Plus.com, Hulu.com or Plus.espn.com in the U.S.
- Apply with confidence. Know if you're approved for a Card with no impact to your credit score. If you're approved and you choose to accept this Card, your credit score may be impacted.
- Terms Apply.
Citi Custom Cash® Card
Good/Excellent (670-850)
Intro APR
Purchases: 0%, 15 months on Purchases
Balance Transfers: 0%, 15 months on Balance Transfers
Regular APR
18.24% - 28.24% (Variable)
Rewards Earn 5% cash back on purchases in your top eligible spend category each billing cycle, up to the first $500 spent, 1% cash back thereafter. Also, earn unlimited 1% cash back on all other purchases. Special Travel Offer: Earn an additional 4% cash back on hotels, car rentals, and attractions booked on Citi Travel℠ portal through 6/30/2026.
1% - 5% cash back
Annual Fee N/A
$0
Welcome Offer Earn $200 in cash back after you spend $1500 on purchases in the first 6 months of account opening. This bonus offer will be fulfilled as 20,000 ThankYou® Points, which can be redeemed for $200 cash back.
20,000 ThankYou® Points
-
We love this card's easy-to-use yet lucrative cash back program. There aren't many no annual fee cards that earn 5% back, and most of the others have rotating bonus categories that change every quarter. This card automatically adjusts to your spending habits, so getting the most out of it is a breeze.
-
- Cash back rewards
- Sign-up bonus
- No annual fee
- 0% intro APR offer
- Bonus cash back limits
- Foreign transaction fee
-
- Earn $200 cash back after you spend $1,500 on purchases in the first 6 months of account opening. This bonus offer will be fulfilled as 20,000 ThankYou® Points, which can be redeemed for $200 cash back.
- 0% Intro APR on balance transfers and purchases for 15 months. After that, the variable APR will be 18.24% - 28.24%, based on your creditworthiness.
- Earn 5% cash back on purchases in your top eligible spend category each billing cycle, up to the first $500 spent, 1% cash back thereafter. Also, earn unlimited 1% cash back on all other purchases. Special Travel Offer: Earn an additional 4% cash back on hotels, car rentals, and attractions booked on Citi Travel℠ portal through 6/30/2026.
- No rotating bonus categories to sign up for – as your spending changes each billing cycle, your earn adjusts automatically when you spend in any of the eligible categories.
- No Annual Fee
- Citi will only issue one Citi Custom Cash® Card account per person.
Bank of America® Customized Cash Rewards Secured credit card
Fair/New to Credit Under(669)
Intro APR
Purchases: N/A
Balance Transfers: N/A
Regular APR
29.24% (Variable)
Rewards Earn 3% cash back in the category of your choice: gas, online shopping, dining, travel, drug stores, or home improvement/furnishings and 2% cash back at grocery stores and wholesale clubs on the first $2,500 in combined choice category/grocery store/wholesale club purchases each quarter, then earn 1%
1% - 3% cash back
Annual Fee
$0
Welcome Offer
N/A
-
One of the most competitive secured credit cards we've come across. The rewards program and $0 annual fee are standout features that beat many similar offers.
-
- Cash back rewards
- No minimum credit score required
- No annual fee
- Can qualify to have security deposit returned
- Minimum deposit amount
- Foreign transaction fee
-
- A minimum security deposit of $200 (maximum of $5,000) is required to open this account.
- Earn 3% cash back in the category of your choice, automatic 2% at grocery stores and wholesale clubs (up to $2,500 in combined choice category/grocery store/wholesale club quarterly purchases) and unlimited 1% on all other purchases.
- No annual fee and no expiration on rewards.
- Contactless Cards - The security of a chip card, with the convenience of a tap.
Good/Excellent (670-850)
Intro APR 0% intro APR for 21 months from account opening on purchases and qualifying balance transfers
Purchases: 0% intro APR, 21 months from account opening
Balance Transfers: 0% intro APR, 21 months from account opening on qualifying balance transfers
Regular APR
17.24%, 23.74%, or 28.99% Variable APR
Rewards
N/A
Annual Fee
$0
Welcome Offer
N/A
-
This no-frills card is a solid choice if your priority is to avoid credit card interest for as long as possible. It offers an incredible intro APR. The balance transfer fee (5%; $5 min.) is higher than some cards, but if you want an equally long intro APR on purchases, this card is hard to beat.
Read Full Review -
- Long 0% intro APR offer
- No annual fee
- Cellphone protection
- Balance transfer fee
- Foreign transaction fee
- No rewards program
-
- Apply Now to take advantage of this offer and learn more about product features, terms and conditions.
- 0% intro APR for 21 months from account opening on purchases and qualifying balance transfers. 17.24%, 23.74%, or 28.99% variable APR thereafter; balance transfers made within 120 days qualify for the intro rate, BT fee of 5%, min: $5.
- $0 annual fee.
- Up to $600 of cell phone protection against damage or theft. Subject to a $25 deductible.
- Through My Wells Fargo Deals, you can get access to personalized deals from a variety of merchants. It's an easy way to earn cash back as an account credit when you shop, dine, or enjoy an experience simply by using an eligible Wells Fargo credit card.
Good/Excellent (670-850)
Intro APR
Purchases: 0%, 12 months on Purchases
Balance Transfers: 0%, 21 months on Balance Transfers
Regular APR
18.24% - 28.99% (Variable)
Rewards
N/A
Annual Fee N/A
$0
Welcome Offer There is an intro balance transfer fee of 3% of each transfer (minimum $5) completed within the first 4 months of account opening. After that, your fee will be 5% of each transfer (minimum $5).
Long intro balance transfer APR
-
This is one of our favorite cards for balance transfers. It has 0% intro APR for 21 months on balance transfers and a discounted balance transfer fee for the first four months. That combo makes it one of the most generous balance transfer offers we’ve seen. But it doesn't have much ongoing value after the intro 0% APR period ends.
Read Full Review -
- Great intro APR
- No annual fee
- No late fees
- No penalty APR
- Choose your own payment date
- No rewards
- Foreign transaction fee
-
- No Late Fees, No Penalty Rate, and No Annual Fee... Ever
- 0% Intro APR on balance transfers for 21 months and on purchases for 12 months from date of account opening. After that the variable APR will be 18.24% - 28.99%, based on your creditworthiness. Balance transfers must be completed within 4 months of account opening.
- There is an intro balance transfer fee of 3% of each transfer (minimum $5) completed within the first 4 months of account opening. After that, your fee will be 5% of each transfer (minimum $5).
- Stay protected with Citi® Quick Lock
Good/Excellent (670-850)
Intro APR
Purchases: 0%, 15 months
Balance Transfers: 0%, 15 months
Regular APR
18.24% - 27.24% Variable APR
Rewards Earn 5% cash back on everyday purchases at different places you shop each quarter like grocery stores, restaurants, gas stations, and more, up to the quarterly maximum when you activate. Plus, earn unlimited 1% cash back on all other purchases.
1% - 5% Cashback
Annual Fee
$0
Welcome Offer INTRO OFFER: Unlimited Cashback Match for all new cardmembers–only from Discover. Discover will automatically match all the cash back you’ve earned at the end of your first year! There’s no minimum spending or maximum rewards. You could turn $150 cash back into $300.
Discover will match all the cash back you’ve earned at the end of your first year.
-
We think this card has among the highest cash back potential for cards with no annual fee. The key is the Unlimited Cashback Match — Discover automatically matches all the cash back new cardholders have earned at the end of the first year. That cash back can seriously add up when you earn 5% cash back on rotating bonus categories (when you activate them, up to the quarterly maximum) and 1% on other purchases.
Read Full Review -
- Rotating bonus categories
- Welcome bonus offer
- Great intro APR offer
- No annual fee
- No foreign transaction fee
- No fixed bonus categories
-
- INTRO OFFER: Unlimited Cashback Match for all new cardmembers–only from Discover. Discover will automatically match all the cash back you’ve earned at the end of your first year! There’s no minimum spending or maximum rewards. You could turn $150 cash back into $300.
- Earn 5% cash back on everyday purchases at different places you shop each quarter like grocery stores, restaurants, gas stations, and more, up to the quarterly maximum when you activate. Plus, earn unlimited 1% cash back on all other purchases.
- Redeem your rewards for cash at any time.
- Apply and you could get a decision in as little as 60 seconds. No annual fee.
- Start shopping and earning rewards in minutes with your digital card, before your physical card arrives in the mail, if eligible.
- Get a 0% intro APR for 15 months on purchases. Then 18.24% to 27.24% Standard Variable Purchase APR applies, based on credit worthiness.
- Terms and conditions apply.
Citi Custom Cash® Card

Good/Excellent (670-850)
Intro APR
Purchases: 0%, 15 months on Purchases
Balance Transfers: 0%, 15 months on Balance Transfers
Regular APR
18.24% - 28.24% (Variable)
Rewards Earn 5% cash back on purchases in your top eligible spend category each billing cycle, up to the first $500 spent, 1% cash back thereafter. Also, earn unlimited 1% cash back on all other purchases. Special Travel Offer: Earn an additional 4% cash back on hotels, car rentals, and attractions booked on Citi Travel℠ portal through 6/30/2026.
1% - 5% cash back
Annual Fee N/A
$0
Welcome Offer Earn $200 in cash back after you spend $1500 on purchases in the first 6 months of account opening. This bonus offer will be fulfilled as 20,000 ThankYou® Points, which can be redeemed for $200 cash back.
20,000 ThankYou® Points
-
We love this card's easy-to-use yet lucrative cash back program. There aren't many no annual fee cards that earn 5% back, and most of the others have rotating bonus categories that change every quarter. This card automatically adjusts to your spending habits, so getting the most out of it is a breeze.
-
- Cash back rewards
- Sign-up bonus
- No annual fee
- 0% intro APR offer
- Bonus cash back limits
- Foreign transaction fee
-
- Earn $200 cash back after you spend $1,500 on purchases in the first 6 months of account opening. This bonus offer will be fulfilled as 20,000 ThankYou® Points, which can be redeemed for $200 cash back.
- 0% Intro APR on balance transfers and purchases for 15 months. After that, the variable APR will be 18.24% - 28.24%, based on your creditworthiness.
- Earn 5% cash back on purchases in your top eligible spend category each billing cycle, up to the first $500 spent, 1% cash back thereafter. Also, earn unlimited 1% cash back on all other purchases. Special Travel Offer: Earn an additional 4% cash back on hotels, car rentals, and attractions booked on Citi Travel℠ portal through 6/30/2026.
- No rotating bonus categories to sign up for – as your spending changes each billing cycle, your earn adjusts automatically when you spend in any of the eligible categories.
- No Annual Fee
- Citi will only issue one Citi Custom Cash® Card account per person.
BankAmericard® credit card
Good/Excellent (670-850)
Intro APR 0% Intro APR for 18 billing cycles for purchases. 0% Intro APR for 18 billing cycles for any balance transfers made in the first 60 days. After the intro APR offer ends, 15.24% - 25.24% Variable APR on purchases and balance transfers will apply. A 3% fee applies to all balance transfers for the first 60 days; a 4% fee applies afterwards. Balance transfers may not be used to pay any account provided by Bank of America.
Purchases: 0% Intro APR for 18 billing cycles for purchases
Balance Transfers: 0% Intro APR for 18 billing cycles for any balance transfers made in the first 60 days
Regular APR
15.24% - 25.24% (Variable)
Rewards
N/A
Annual Fee
$0
Welcome Offer
N/A
-
Few cards in this category can compete with this offers long 0% intro APR offer.
-
- No annual fee
- FICO® Score for free
- No penalty APR
- Great 0% intro APR offer
- No rewards
- Balance transfer fee
-
- 0% Intro APR for 18 billing cycles for purchases, and for any balance transfers made in the first 60 days. After the Intro APR offer ends, a Variable APR that’s currently 15.24% - 25.24% will apply. A 3% Intro balance transfer fee will apply for the first 60 days your account is open. After the Intro balance transfer fee offer ends, the fee for future balance transfers is 4%. Balance transfers may not be used to pay any account provided by Bank of America.
- No annual fee.
- No penalty APR. Paying late won't automatically raise your interest rate (APR). Other account pricing and terms apply.
- Access your FICO® Score for free within Online Banking or your Mobile Banking app.
- Contactless Cards - The security of a chip card, with the convenience of a tap.
- This online only offer may not be available if you leave this page or if you visit a Bank of America financial center. You can take advantage of this offer when you apply now.
Good/Excellent (670-850)
Intro APR
Purchases: 0%, 15 months
Balance Transfers: 0%, 15 months
Regular APR
18.24% - 27.24% Variable APR
Rewards Earn 5% cash back on everyday purchases at different places you shop each quarter like grocery stores, restaurants, gas stations, and more, up to the quarterly maximum when you activate. Plus, earn unlimited 1% cash back on all other purchases.
1% - 5% Cashback
Annual Fee
$0
Welcome Offer INTRO OFFER: Unlimited Cashback Match for all new cardmembers–only from Discover. Discover will automatically match all the cash back you’ve earned at the end of your first year! There’s no minimum spending or maximum rewards. You could turn $150 cash back into $300.
Discover will match all the cash back you’ve earned at the end of your first year.
-
We think this card has among the highest cash back potential for cards with no annual fee. The key is the Unlimited Cashback Match — Discover automatically matches all the cash back new cardholders have earned at the end of the first year. That cash back can seriously add up when you earn 5% cash back on rotating bonus categories (when you activate them, up to the quarterly maximum) and 1% on other purchases.
Read Full Review -
- Rotating bonus categories
- Welcome bonus offer
- Great intro APR offer
- No annual fee
- No foreign transaction fee
- No fixed bonus categories
-
- INTRO OFFER: Unlimited Cashback Match for all new cardmembers–only from Discover. Discover will automatically match all the cash back you’ve earned at the end of your first year! There’s no minimum spending or maximum rewards. You could turn $150 cash back into $300.
- Earn 5% cash back on everyday purchases at different places you shop each quarter like grocery stores, restaurants, gas stations, and more, up to the quarterly maximum when you activate. Plus, earn unlimited 1% cash back on all other purchases.
- Redeem your rewards for cash at any time.
- Apply and you could get a decision in as little as 60 seconds. No annual fee.
- Start shopping and earning rewards in minutes with your digital card, before your physical card arrives in the mail, if eligible.
- Get a 0% intro APR for 15 months on purchases. Then 18.24% to 27.24% Standard Variable Purchase APR applies, based on credit worthiness.
- Terms and conditions apply.
Good/Excellent (670-850)
Intro APR 0% intro APR for 12 months from account opening on purchases and qualifying balance transfers
Purchases: 0% intro APR, 12 months from account opening
Balance Transfers: 0% intro APR, 12 months from account opening on qualifying balance transfers
Regular APR
19.24%, 24.24%, or 29.24% Variable APR
Rewards Earn unlimited 2% cash rewards on purchases.
2% cash rewards
Annual Fee
$0
Welcome Offer Earn a $200 cash rewards bonus after spending $500 in purchases in the first 3 months.
$200 cash rewards
-
This card’s unlimited 2% cash rewards on purchases is the highest we’ve seen for a flat-rate rewards card with no annual fee. It also has an incredibly easy-to-earn $200 welcome bonus and a decent intro APR offer. We simply haven’t come across this combination of top perks in one card before.
Read Full Review -
- Unlimited 2% cash rewards
- Long 0% intro APR offer
- Generous cash rewards welcome bonus
- No annual fee
- Cellphone protections
- No bonus categories
- Foreign transaction fees
- Balance transfer fee
-
- Apply Now to take advantage of this offer and learn more about product features, terms and conditions.
- Earn a $200 cash rewards bonus after spending $500 in purchases in the first 3 months.
- Earn unlimited 2% cash rewards on purchases.
- 0% intro APR for 12 months from account opening on purchases and qualifying balance transfers. 19.24%, 24.24%, or 29.24% variable APR thereafter; balance transfers made within 120 days qualify for the intro rate and fee of 3% then a BT fee of up to 5%, min: $5.
- $0 annual fee.
- No categories to track or remember and cash rewards don’t expire as long as your account remains open.
- Find tickets to top sports and entertainment events, book travel, make dinner reservations and more with your complimentary 24/7 Visa Signature® Concierge.
- Up to $600 of cell phone protection against damage or theft. Subject to a $25 deductible.
On American Express' Secure Website.
Terms apply
On American Express' Secure Website.
Terms apply
Good/Excellent (670-850)
Intro APR
Purchases: 0% on purchases, 12 months
Balance Transfers: 0%, 12 months
APR
20.24%-29.24% Variable
Rewards 6% Cash Back at U.S. supermarkets on up to $6,000 per year in purchases (then 1%). 6% Cash Back on select U.S. streaming subscriptions. 3% Cash Back at U.S. gas stations. 3% Cash Back on transit (including taxis/rideshare, parking, tolls, trains, buses and more). 1% Cash Back on other purchases. Cash Back is received in the form of Reward Dollars that can be redeemed as a statement credit or at Amazon.com checkout.
1%-6% Cash Back
Annual Fee
$0 intro annual fee for the first year, then $95.
Welcome Offer Earn a $250 statement credit after you spend $3,000 in eligible purchases on your new Card within the first 6 months.
$250
-
This card is a smart choice for earning top-tier rewards on everyday purchases. It features a market-leading rate of a whopping 6% cash back at U.S. supermarkets (on up to $6,000 per year), 6% on select U.S. streaming services, and 3% on U.S. gas and transit. Plus, there’s a strong welcome offer: Earn a $250 statement credit after spending $3,000 in the first 6 months. With 0% intro APR on purchases and balance transfers for the first 12 months and $0 annual fee for the first year (then $95), it’s one of our favorite credit cards for a reason. Terms apply.
Read Full Review -
- Big welcome offer
- U.S. supermarkets rewards
- U.S. gas stations rewards
- Streaming subscription rewards
- Annual fee
- Foreign transaction fee
-
- Earn a $250 statement credit after you spend $3,000 in eligible purchases on your new Card within the first 6 months.
- $0 intro annual fee for the first year, then $95.
- Buy Now, Pay Later: Enjoy $0 intro plan fees when you use Plan It® to split up large purchases into monthly installments with a fixed fee. Pay $0 intro plan fees on plans created during the first 12 months from the date of account opening. Plans created after that will have a monthly plan fee up to 1.33% of each eligible purchase amount moved into a plan based on the plan duration, the APR that would otherwise apply to the purchase, and other factors.
- Low Intro APR: 0% intro APR on purchases and balance transfers for 12 months from the date of account opening. After that, your APR will be a variable APR of 20.24% - 29.24%.
- 6% Cash Back at U.S. supermarkets on up to $6,000 per year in purchases (then 1%).
- 6% Cash Back on select U.S. streaming subscriptions.
- 3% Cash Back at U.S. gas stations and on transit (including taxis/rideshare, parking, tolls, trains, buses and more).
- 1% Cash Back on other purchases.
- Cash Back is received in the form of Reward Dollars that can be redeemed as a statement credit or at Amazon.com checkout.
- $84 Disney Bundle Credit: With your enrolled Blue Cash Preferred® Card, spend $9.99 or more each month on an auto-renewing Disney Bundle subscription, to receive a monthly statement credit of $7. Valid only at Disney Plus.com, Hulu.com or Plus.espn.com in the U.S.
- Apply with confidence. Know if you're approved for a Card with no impact to your credit score. If you're approved and you choose to accept this Card, your credit score may be impacted.
- Terms Apply.
Good/Excellent (670-850)
Intro APR 0% Intro APR on Purchases and Balance Transfers for 15 months
Purchases: 0% Intro APR on Purchases, 15 months
Balance Transfers: 0% Intro APR on Balance Transfers, 15 months
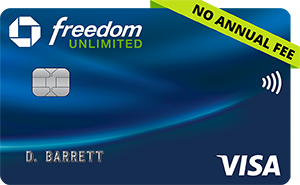
Regular APR
18.99% - 28.49% Variable
Rewards Enjoy 5% cash back on travel purchased through Chase Travel℠, our premier rewards program that lets you redeem rewards for cash back, travel, gift cards and more; 3% cash back on drugstore purchases and dining at restaurants, including takeout and eligible delivery service, and 1.5% on all other purchases
1.5% - 5% cash back
Annual Fee
$0
Welcome Offer Intro Offer: Earn a $200 Bonus after you spend $500 on purchases in your first 3 months from account opening
Earn $200 cash back
-
The Chase Freedom Unlimited® is the ideal all-in-one card, offering both big upfront value and long-term rewards. New cardholders can earn a $200 bonus after spending $500 in the first 3 months. Plus, enjoy unlimited 3% back on dining and drugstores, 5% on travel booked through Chase Travel, and 1.5% on all other purchases. With the added benefit of 0% intro APR for 15 months, this card is perfect for a one-card wallet.
Read Full Review -
- Innovative sign-up bonus
- Purchase and travel protections
- Robust rewards program
- Great intro APR
- No annual fee
- Limited bonus opportunities on everyday spending
- Foreign transaction fee
-
- Intro Offer: Earn a $200 Bonus after you spend $500 on purchases in your first 3 months from account opening
- Enjoy 5% cash back on travel purchased through Chase Travel℠, our premier rewards program that lets you redeem rewards for cash back, travel, gift cards and more; 3% cash back on drugstore purchases and dining at restaurants, including takeout and eligible delivery service, and 1.5% on all other purchases.
- No minimum to redeem for cash back. You can choose to receive a statement credit or direct deposit into most U.S. checking and savings accounts. Cash Back rewards do not expire as long as your account is open!
- Enjoy 0% Intro APR for 15 months from account opening on purchases and balance transfers, then a variable APR of 18.99% - 28.49%.
- No annual fee – You won't have to pay an annual fee for all the great features that come with your Freedom Unlimited® card
- Keep tabs on your credit health, Chase Credit Journey helps you monitor your credit with free access to your latest score, alerts, and more.
- Member FDIC
Fair to Excellent (580-850)
Intro APR
Purchases: N/A
Balance Transfers: 0%, 18 months on Balance Transfers
Regular APR
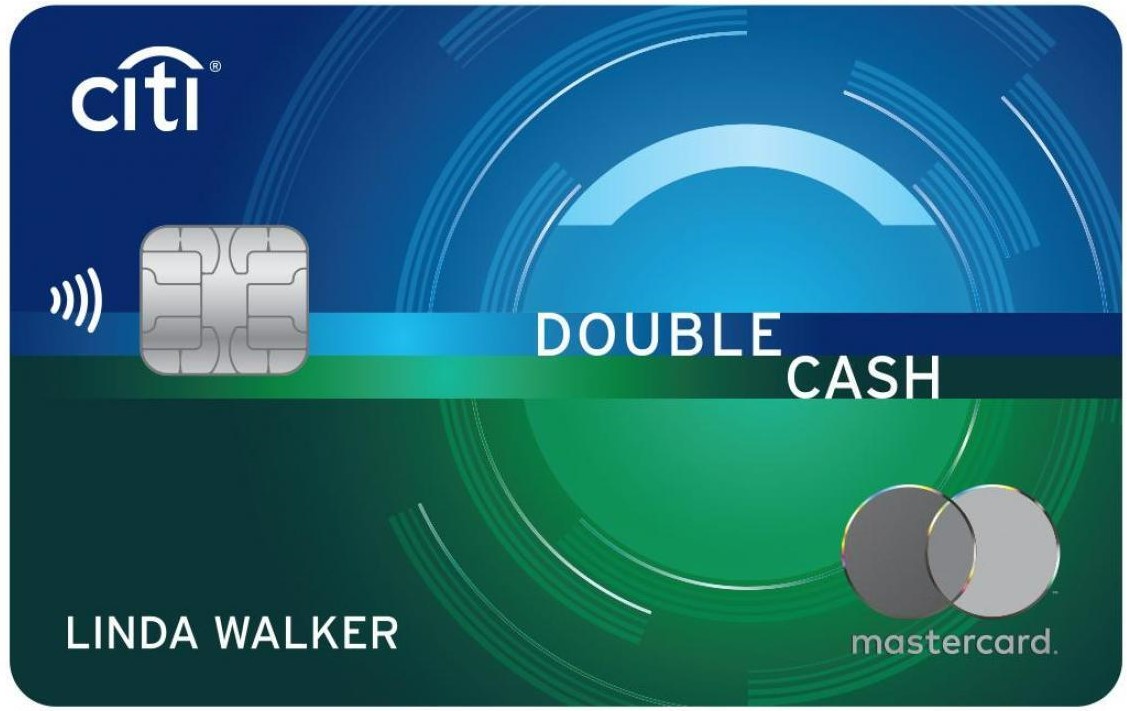
18.24% - 28.24% (Variable)
Rewards Earn 2% on every purchase with unlimited 1% cash back when you buy, plus an additional 1% as you pay for those purchases. To earn cash back, pay at least the minimum due on time. Plus, earn 5% total cash back on hotel, car rentals and attractions booked with Citi Travel.
2% cash back
Annual Fee N/A
$0
Welcome Offer Earn $200 cash back after you spend $1,500 on purchases in the first 6 months of account opening. This bonus offer will be fulfilled as 20,000 ThankYou® Points, which can be redeemed for $200 cash back.
$200
-
This card combines a top-notch balance transfer offer with best-in-class unlimited 2% cash back on purchases. There's no introductory APR for purchases, so you'll need to pay those off in full every month if you want to avoid interest charges.
Read Full Review -
- High cash back
- 0% intro APR balance transfer offer
- No annual fee
- Free credit score monitoring
- Foreign transaction fee
- No 0% intro APR on purchases
-
- Earn $200 cash back after you spend $1,500 on purchases in the first 6 months of account opening. This bonus offer will be fulfilled as 20,000 ThankYou® Points, which can be redeemed for $200 cash back.
- Earn 2% on every purchase with unlimited 1% cash back when you buy, plus an additional 1% as you pay for those purchases. To earn cash back, pay at least the minimum due on time. Plus, earn 5% total cash back on hotel, car rentals and attractions booked with Citi Travel.
- Balance Transfer Only Offer: 0% intro APR on Balance Transfers for 18 months. After that, the variable APR will be 18.24% - 28.24%, based on your creditworthiness.
- Balance Transfers do not earn cash back. Intro APR does not apply to purchases.
- If you transfer a balance, interest will be charged on your purchases unless you pay your entire balance (including balance transfers) by the due date each month.
- There is an intro balance transfer fee of 3% of each transfer (minimum $5) completed within the first 4 months of account opening. After that, your fee will be 5% of each transfer (minimum $5).
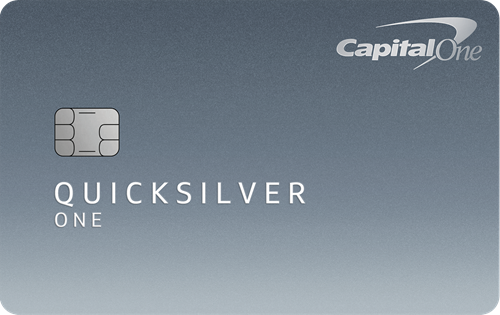
On Capital One's Secure Website.
On Capital One's Secure Website.
Fair (300-669)
Intro APR
Purchases: N/A
Balance Transfers: N/A
Regular APR
29.74% (Variable)
Rewards Earn unlimited 1.5% cash back on every purchase, every day. Earn unlimited 5% cash back on hotels and rental cars booked through Capital One Travel, where you'll get Capital One's best prices on thousands of trip options. Terms apply.
1.5%-5% cash back
Annual Fee
$39
Welcome Offer N/A
N/A
-
Getting 1.5% back on every purchase couldn't be easier — and it makes this Capital One card a standout for those who want to improve their credit with responsible use and still earn rewards. You can even sign up to have your cash back redeemed as a statement credit automatically, saving you money every month. Note that it comes with an annual fee of $39, though. Check out this card to simplify your life.
-
- Solid cash back rate
- No foreign transaction fee
- Flexible credit score requirements
- Annual fee
- No sign-up bonus
- No intro APR offer
-
- Earn unlimited 1.5% cash back on every purchase, every day
- No rotating categories or limits to how much you can earn, and cash back doesn't expire for the life of the account. It's that simple
- Be automatically considered for a higher credit line in as little as 6 months
- Enjoy peace of mind with $0 Fraud Liability so that you won't be responsible for unauthorized charges
- Help strengthen your credit for the future with responsible card use
- Earn unlimited 5% cash back on hotels and rental cars booked through Capital One Travel, where you'll get Capital One's best prices on thousands of trip options. Terms apply
- Monitor your credit score with CreditWise from Capital One. It's free for everyone
- Check out quickly and securely with a contactless card, without touching a terminal or handing your card to a cashier. Just hover your card over a contactless reader, wait for the confirmation, and you're all set
On Bank of America's Secure Website.
On Bank of America's Secure Website.
Earn 6% cash back in the category of your choice -- like dining, travel, or online shopping -- for the first year. Plus, score a $200 cash rewards bonus after qualifying purchases.
Good/Excellent (670-850)
Intro APR 0% Intro APR for 15 billing cycles for purchases, and for any balance transfers made in the first 60 days. After the Intro APR offer ends, a Variable APR that’s currently 18.24% - 28.24% will apply. A 3% Intro balance transfer fee will apply for the first 60 days your account is open. After the Intro balance transfer fee offer ends, the fee for future balance transfers is 4%. Balance transfers may not be used to pay any account provided by Bank of America.
Purchases: 0% Intro APR for 15 billing cycles for purchases
Balance Transfers: 0% Intro APR for 15 billing cycles for any balance transfers made in the first 60 days
Regular APR
18.24% - 28.24% (Variable)
Rewards Earn 6% cash back for the first year in the category of your choice, 2% cash back at grocery stores and wholesale clubs, and unlimited 1% cash back on all other purchases. Earn 6% and 2% cash back on the first $2,500 in combined purchases each quarter in the choice category, and at grocery stores and wholesale clubs, then earn unlimited 1% thereafter. After the first year from account opening, you’ll earn 3% cash back on purchases in your choice category and 2% cash back at grocery stores and wholesale clubs up to the quarterly maximum.
1% - 6% cash back
Annual Fee
$0
Welcome Offer $200 online cash rewards bonus after you make at least $1,000 in purchases in the first 90 days of account opening.
$200 cash back
-
This card's wide range of extra cash back options speaks for itself, with a choice of six bonus categories you can change monthly for 6% earnings for the first year in the category of your choice. And you can earn 2% back automatically at grocery stores and wholesale clubs. No annual fee and a nice welcome bonus also make this one a winner. Plus, if you're a Bank of America Preferred Rewards member, this card will be even more valuable for you.
Read Full Review -
- Competitive welcome bonus
- Bonus cash back in a category of your choice
- No annual fee
- Great intro & transfer APR offer
- Relationship rewards bonus
- Foreign transaction fee
- Limit on bonus cash back
-
- New offer! Earn 6% cash back for the first year in the category of your choice: gas and EV charging stations; online shopping, including cable, internet, phone plans and streaming; dining; travel; drug stores and pharmacies; or home improvement and furnishings. You’ll automatically earn 2% cash back at grocery stores and wholesale clubs, and unlimited 1% cash back on all other purchases. After the first year from account opening, you’ll earn 3% cash back on purchases in your choice category.
- Earn 6% and 2% cash back on the first $2,500 in combined purchases each quarter in the choice category, and at grocery stores and wholesale clubs, then earn unlimited 1% thereafter. After the 3% first-year bonus offer ends, you will earn 3% and 2% cash back on these purchases up to the quarterly maximum.
- $200 online cash rewards bonus after you make at least $1,000 in purchases in the first 90 days of account opening.
- With the Bank of America Preferred Rewards® program, members can earn 25%-75% more cash back on every purchase. That means the 3% choice category could go up to 3.75%-5.25%. The Preferred Rewards bonus is not applied to the 3% first-year bonus.
- No annual fee and cash rewards don’t expire as long as your account remains open.
- 0% Intro APR for 15 billing cycles for purchases, and for any balance transfers made in the first 60 days. After the Intro APR offer ends, a Variable APR that’s currently 18.24% - 28.24% will apply. A 3% Intro balance transfer fee will apply for the first 60 days your account is open. After the Intro balance transfer fee offer ends, the fee for future balance transfers is 4%. Balance transfers may not be used to pay any account provided by Bank of America.
- Contactless Cards - The security of a chip card, with the convenience of a tap.
- This online only offer may not be available if you leave this page or if you visit a Bank of America financial center. You can take advantage of this offer when you apply now.
Good/Excellent (670-850)
Intro APR
Purchases: 0%, 6 months
Balance Transfers: 0%, 18 months
Regular APR
18.24% - 27.24% Variable APR
Rewards 2% cash back at Gas Stations and Restaurants on up to $1,000 in combined purchases each quarter. 1% unlimited cash back on all other purchases - automatically
1% - 2% Cashback
Annual Fee
$0
Welcome Offer INTRO OFFER: Unlimited Cashback Match for all new cardmembers–only from Discover. Discover will automatically match all the cash back you’ve earned at the end of your first year! There’s no minimum spending or maximum rewards.
Discover will match all the cash back you’ve earned at the end of your first year.
-
The main draw of this Discover card is the balance transfer offer, which is one of the best we've come across. Unlike many balance transfer cards, it combines that with cash back rewards. But the cash back program doesn't measure up to what other cards offer.
-
- Welcome bonus offer
- Gas and restaurants rewards
- 0% intro APR
- No annual fee
- No foreign transaction fee
- Low cash back rates
-
- INTRO OFFER: Unlimited Cashback Match for all new cardmembers–only from Discover. Discover will automatically match all the cash back you’ve earned at the end of your first year! There’s no minimum spending or maximum rewards.
- Earn 2% cash back at Gas Stations and Restaurants on up to $1,000 in combined purchases each quarter, automatically. Plus earn unlimited 1% cash back on all other purchases.
- Get a 0% intro APR for 18 months on balance transfers. Then 18.24% to 27.24% Standard Variable APR applies, based on credit worthiness.
- Redeem your rewards for cash at any time.
- No annual fee.
- Terms and conditions apply.
Good/Excellent (670-850)
Intro APR 0% intro APR for 21 months from account opening on purchases and qualifying balance transfers
Purchases: 0% intro APR, 21 months from account opening
Balance Transfers: 0% intro APR, 21 months from account opening on qualifying balance transfers
Regular APR
17.24%, 23.74%, or 28.99% Variable APR
Rewards
N/A
Annual Fee
$0
Welcome Offer
N/A
-
This no-frills card is a solid choice if your priority is to avoid credit card interest for as long as possible. It offers an incredible intro APR. The balance transfer fee (5%; $5 min.) is higher than some cards, but if you want an equally long intro APR on purchases, this card is hard to beat.
Read Full Review -
- Long 0% intro APR offer
- No annual fee
- Cellphone protection
- Balance transfer fee
- Foreign transaction fee
- No rewards program
-
- Apply Now to take advantage of this offer and learn more about product features, terms and conditions.
- 0% intro APR for 21 months from account opening on purchases and qualifying balance transfers. 17.24%, 23.74%, or 28.99% variable APR thereafter; balance transfers made within 120 days qualify for the intro rate, BT fee of 5%, min: $5.
- $0 annual fee.
- Up to $600 of cell phone protection against damage or theft. Subject to a $25 deductible.
- Through My Wells Fargo Deals, you can get access to personalized deals from a variety of merchants. It's an easy way to earn cash back as an account credit when you shop, dine, or enjoy an experience simply by using an eligible Wells Fargo credit card.
Good/Excellent (670-850)
Intro APR 0% intro APR for 12 months from account opening on purchases and qualifying balance transfers
Purchases: 0% intro APR, 12 months from account opening
Balance Transfers: 0% intro APR, 12 months from account opening on qualifying balance transfers
Regular APR
19.24%, 24.24%, or 29.24% Variable APR
Rewards Earn unlimited 2% cash rewards on purchases.
2% cash rewards
Annual Fee
$0
Welcome Offer Earn a $200 cash rewards bonus after spending $500 in purchases in the first 3 months.
$200 cash rewards
-
This card’s unlimited 2% cash rewards on purchases is the highest we’ve seen for a flat-rate rewards card with no annual fee. It also has an incredibly easy-to-earn $200 welcome bonus and a decent intro APR offer. We simply haven’t come across this combination of top perks in one card before.
Read Full Review -
- Unlimited 2% cash rewards
- Long 0% intro APR offer
- Generous cash rewards welcome bonus
- No annual fee
- Cellphone protections
- No bonus categories
- Foreign transaction fees
- Balance transfer fee
-
- Apply Now to take advantage of this offer and learn more about product features, terms and conditions.
- Earn a $200 cash rewards bonus after spending $500 in purchases in the first 3 months.
- Earn unlimited 2% cash rewards on purchases.
- 0% intro APR for 12 months from account opening on purchases and qualifying balance transfers. 19.24%, 24.24%, or 29.24% variable APR thereafter; balance transfers made within 120 days qualify for the intro rate and fee of 3% then a BT fee of up to 5%, min: $5.
- $0 annual fee.
- No categories to track or remember and cash rewards don’t expire as long as your account remains open.
- Find tickets to top sports and entertainment events, book travel, make dinner reservations and more with your complimentary 24/7 Visa Signature® Concierge.
- Up to $600 of cell phone protection against damage or theft. Subject to a $25 deductible.
Good/Excellent (670-850)
Intro APR
Purchases: 0%, 12 months on Purchases
Balance Transfers: 0%, 21 months on Balance Transfers
Regular APR
18.24% - 28.99% (Variable)
Rewards
N/A
Annual Fee N/A
$0
Welcome Offer There is an intro balance transfer fee of 3% of each transfer (minimum $5) completed within the first 4 months of account opening. After that, your fee will be 5% of each transfer (minimum $5).
Long intro balance transfer APR
-
This is one of our favorite cards for balance transfers. It has 0% intro APR for 21 months on balance transfers and a discounted balance transfer fee for the first four months. That combo makes it one of the most generous balance transfer offers we’ve seen. But it doesn't have much ongoing value after the intro 0% APR period ends.
Read Full Review -
- Great intro APR
- No annual fee
- No late fees
- No penalty APR
- Choose your own payment date
- No rewards
- Foreign transaction fee
-
- No Late Fees, No Penalty Rate, and No Annual Fee... Ever
- 0% Intro APR on balance transfers for 21 months and on purchases for 12 months from date of account opening. After that the variable APR will be 18.24% - 28.99%, based on your creditworthiness. Balance transfers must be completed within 4 months of account opening.
- There is an intro balance transfer fee of 3% of each transfer (minimum $5) completed within the first 4 months of account opening. After that, your fee will be 5% of each transfer (minimum $5).
- Stay protected with Citi® Quick Lock
Fair to Excellent (580-850)
Intro APR
Purchases: N/A
Balance Transfers: 0%, 18 months on Balance Transfers
Regular APR
18.24% - 28.24% (Variable)
Rewards Earn 2% on every purchase with unlimited 1% cash back when you buy, plus an additional 1% as you pay for those purchases. To earn cash back, pay at least the minimum due on time. Plus, earn 5% total cash back on hotel, car rentals and attractions booked with Citi Travel.
2% cash back
Annual Fee N/A
$0
Welcome Offer Earn $200 cash back after you spend $1,500 on purchases in the first 6 months of account opening. This bonus offer will be fulfilled as 20,000 ThankYou® Points, which can be redeemed for $200 cash back.
$200
-
This card combines a top-notch balance transfer offer with best-in-class unlimited 2% cash back on purchases. There's no introductory APR for purchases, so you'll need to pay those off in full every month if you want to avoid interest charges.
Read Full Review -
- High cash back
- 0% intro APR balance transfer offer
- No annual fee
- Free credit score monitoring
- Foreign transaction fee
- No 0% intro APR on purchases
-
- Earn $200 cash back after you spend $1,500 on purchases in the first 6 months of account opening. This bonus offer will be fulfilled as 20,000 ThankYou® Points, which can be redeemed for $200 cash back.
- Earn 2% on every purchase with unlimited 1% cash back when you buy, plus an additional 1% as you pay for those purchases. To earn cash back, pay at least the minimum due on time. Plus, earn 5% total cash back on hotel, car rentals and attractions booked with Citi Travel.
- Balance Transfer Only Offer: 0% intro APR on Balance Transfers for 18 months. After that, the variable APR will be 18.24% - 28.24%, based on your creditworthiness.
- Balance Transfers do not earn cash back. Intro APR does not apply to purchases.
- If you transfer a balance, interest will be charged on your purchases unless you pay your entire balance (including balance transfers) by the due date each month.
- There is an intro balance transfer fee of 3% of each transfer (minimum $5) completed within the first 4 months of account opening. After that, your fee will be 5% of each transfer (minimum $5).
Good/Excellent (670-850)
Intro APR
Purchases: N/A
Balance Transfers: N/A
Regular APR
19.99% - 29.24% (Variable)
Rewards Earn unlimited 2X miles on every purchase. Earn unlimited 5X miles on hotels, vacation rentals, and rental cars booked through Capital One Travel, where you'll get Capital One's best prices on thousands of trip options.
2X-5X miles
Annual Fee
$95
Welcome Offer 75,000 Miles once you spend $4,000 on purchases within 3 months from account opening
75,000 Miles
-
This is one of our top travel credit cards overall, because of its highly lucrative, yet dead simple rewards program. Earn unlimited 2X miles on every purchase and use them to get reimbursed for any travel purchase — or to book a trip through Capital One Travel. TSA PreCheck® credit and the opportunity to earn a massive sign-up bonus (equal to $750 in travel) make this credit card one of the best travel companions.
-
- Excellent sign-up bonus
- Unlimited miles on purchases
- Travel credit
- Multiple ways to use miles
- No foreign transaction fee
- Annual fee
- No 0% intro APR offer
- Low cash back redemption value
-
- Enjoy a one-time bonus of 75,000 miles once you spend $4,000 on purchases within 3 months from account opening, equal to $750 in travel
- Earn unlimited 2X miles on every purchase, every day
- Earn 5X miles on hotels, vacation rentals and rental cars booked through Capital One Travel, where you'll get Capital One's best prices on thousands of trip options
- Miles won't expire for the life of the account and there's no limit to how many you can earn
- Receive up to a $120 credit for Global Entry or TSA PreCheck®
- Use your miles to get reimbursed for any travel purchase—or redeem by booking a trip through Capital One Travel
- Enjoy a $50 experience credit and other premium benefits with every hotel and vacation rental booked from the Lifestyle Collection
- Transfer your miles to your choice of 15+ travel loyalty programs
Good/Excellent (670-850)
Intro APR
Purchases: N/A
Balance Transfers: N/A
Regular APR
19.99% - 28.24% Variable
Rewards Enjoy benefits such as 5x on travel purchased through Chase Travel℠, 3x on dining, select streaming services and online groceries, 2x on all other travel purchases, 1x on all other purchases
5x on Chase Travel℠, 3x on dining, 2x on all other travel
Annual Fee
$95
Welcome Offer Earn 75,000 bonus points after you spend $5,000 on purchases in the first 3 months from account opening.
75,000 bonus points
-
This card easily justifies the (very reasonable) annual fee with benefits that deliver real value. Earn 75,000 bonus points after you spend $5,000 on purchases in the first 3 months, which we estimate is worth at least $750 in Chase Travel℠ value. Plus, enjoy bonus travel and dining rewards, a $50 annual hotel credit, and 10% anniversary points boost. With added travel protections like rental car insurance and trip reimbursement, we think this card is a game-changer for any traveler.
Read Full Review -
- Big sign-up bonus
- Travel rewards
- Dining rewards
- Flexible travel points
- Consumer and travel protections
- Annual fee
- Limited-time perks
-
- Earn 75,000 bonus points after you spend $5,000 on purchases in the first 3 months from account opening.
- Enjoy benefits such as 5x on travel purchased through Chase Travel℠, 3x on dining, select streaming services and online groceries, 2x on all other travel purchases, 1x on all other purchases
- Earn up to $50 in statement credits each account anniversary year for hotel stays through Chase Travel℠
- 10% anniversary points boost - each account anniversary you'll earn bonus points equal to 10% of your total purchases made the previous year.
- Count on Trip Cancellation/Interruption Insurance, Auto Rental Collision Damage Waiver, Lost Luggage Insurance and more.
- Complimentary DashPass which unlocks $0 delivery fees & lower service fees for a min. of one year when you activate by 12/31/27. Plus, a $10 promo each month on non-restaurant orders.
- Member FDIC
On American Express' Secure Website.
Terms apply
On American Express' Secure Website.
Terms apply
Good/Excellent (670-850)
Intro APR
Purchases: N/A
Balance Transfers: N/A
APR
See Pay Over Time APR
Rewards Earn 5X Membership Rewards® Points for flights booked directly with airlines or with American Express Travel® up to $500,000 on these purchases per calendar year and earn 5X Membership Rewards® Points on prepaid hotels booked with American Express Travel®. 1X Membership Rewards® Points on other purchases. Terms apply.
1X-5X Membership Rewards® Points
Annual Fee
$695
Welcome Offer You may be eligible for as high as 175,000 Membership Rewards® Points after spending $8,000 in eligible purchases on your new Card in your first 6 months of Membership. Welcome offers vary and you may not be eligible for an offer.
As High As 175,000 points. Find Out Your Offer.
-
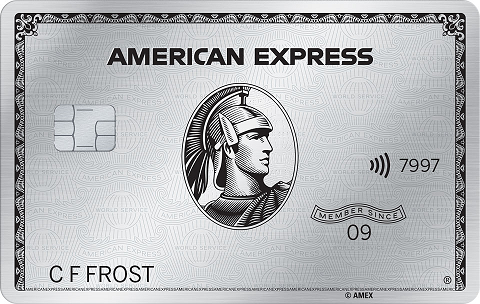
This luxury travel card has some of the most prestigious perks you'll find — access to over 1,400 airport lounges, elite status with Hilton and Marriott Bonvoy (enrollment required), and spending credits worth over $1,500 in value every year. Just be ready for the hefty annual fee, which can be offset in the first year with a welcome offer. Terms apply.
Read Full Review -
- Big welcome offer
- Substantial spending credits
- Airport lounge access
- Hotel benefits
- Flexible travel points
- Annual fee
- Limited bonus categories
- Spending credits can be complicated to manage
-
- You may be eligible for as high as 175,000 Membership Rewards® Points after you spend $8,000 in eligible purchases on your new Card in your first 6 months of Card Membership. Welcome offers vary and you may not be eligible for an offer. Apply to know if you’re approved and find out your exact welcome offer amount – all with no credit score impact. If you’re approved and choose to accept the Card, your score may be impacted.
- Earn 5X Membership Rewards® Points for flights booked directly with airlines or with American Express Travel® up to $500,000 on these purchases per calendar year and earn 5X Membership Rewards® Points on prepaid hotels booked with American Express Travel®.
- $200 Hotel Credit: Get up to $200 back in statement credits each year on prepaid Fine Hotels + Resorts® or The Hotel Collection bookings through American Express Travel using your Platinum Card®. The Hotel Collection requires a minimum two-night stay.
- $240 Digital Entertainment Credit: Get up to $20 back in statement credits each month on eligible purchases made with your Platinum Card® on one or more of the following: Disney+, a Disney+ bundle, ESPN+, Hulu, The New York Times, Peacock, and The Wall Street Journal. Enrollment required.
- Enjoy the benefits of the Global Lounge Collection, with over $500 of annual value if you visit Centurion Lounges and each of our partner lounges including Delta Sky Club® lounges when flying an eligible Delta flight (subject to visit limitations) , select Lufthansa lounges when flying Lufthansa, Plaza Premium lounges and Escape Lounges, and enroll in Priority Pass Select. See terms.
- A Walmart+ membership can get you free shipping with no order minimum on eligible items shipped by Walmart. Use your Platinum Card® to pay for a monthly Walmart+ membership (subject to auto-renewal) and receive one statement credit for up to $12.95 (plus applicable taxes. Plus Ups not eligible) each month. Free Shipping excludes most Marketplace items, freight & certain location surcharges. Paramount+ Essential plan only, separate registration required.
- $200 Airline Fee Credit: Select one qualifying airline and then receive up to $200 in statement credits per calendar year when incidental fees are charged by the airline to your Platinum Card® Account. American Express relies on airlines to submit the correct information on airline transactions to identify incidental fee purchases. If you do not see a credit for a qualifying incidental purchase on your eligible Card after 8 weeks, simply call the number on the back of your Card. Qualifying airlines are subject to change. See terms & conditions for more details.
- $200 Uber Cash: Platinum Card® Members can ride or dine in style with $15 in Uber Cash each month, plus a bonus $20 in December after adding their Card to their Uber account. Use your Uber Cash on rides and orders in the U.S. when you select an Amex Card for your transaction.
- $199 CLEAR® Plus Credit: CLEAR® Plus helps get you to your gate faster by using unique facial attributes to verify you are you at 50+ airports nationwide. Receive up to $199 in statement credits per calendar year after you pay for your CLEAR Plus Membership (subject to auto-renewal) with the Platinum Card®.
- Receive either a $120 statement credit every 4 years for a Global Entry application fee or a statement credit up to $85 every 4.5 years for a TSA PreCheck® (through a TSA official enrollment provider) application fee, when charged to your Platinum Card®. Card Members approved for Global Entry will also receive access to TSA PreCheck at no additional cost.
- Shop Saks with Platinum: Get up to $100 in statement credits annually for purchases in Saks Fifth Avenue stores or at saks.com on your Platinum Card®. That's up to $50 in statement credits semi-annually. Enrollment required.
- Use Global Dining Access by Resy to access premium dining experiences. Receive Priority Notify and unlock insider access to some of the world's most sought-after restaurants with Global Dining Access by Resy. Download the Resy iOS app or log into Resy.com and add your Platinum Card® to your Resy profile to take advantage of your special benefits and discover restaurants near you.
- $695 annual fee.
- Terms Apply.
Good/Excellent (670-850)
Intro APR 0% intro APR on purchases for 12 months from account opening
Purchases: 0% intro APR, 12 months from account opening
Balance Transfers: N/A
Regular APR
19.24%, 24.24%, or 29.24% Variable APR
Rewards Earn unlimited 3X points on restaurants, travel, gas stations, transit, popular streaming services and phone plans. Plus earn 1X points on other purchases.
1X-3X points
Annual Fee
$0
Welcome Offer Earn 20,000 bonus points when you spend $1,000 in purchases in the first 3 months - that's a $200 cash redemption value.
20,000 bonus points
-
This card offers unlimited 3X points on common things like restaurants, gas stations, travel, transit, popular streaming services, and phone plans. Plus, earn 1X points on other purchases. This could be a great pick if you spend a lot in those categories. A solid welcome bonus and cell phone protection are the cherries on top.
-
- Strong welcome bonus for a no annual fee card
- Earn Unlimited 3x points on useful categories
- Cellphone protection
- Other cards offer larger bonuses, though they usually come with annual fees
- The 1x points baseline rewards rate on other purchases, though normal for this type of card, can be beat
-
- Apply Now to take advantage of this offer and learn more about product features, terms and conditions.
- Earn 20,000 bonus points when you spend $1,000 in purchases in the first 3 months - that's a $200 cash redemption value.
- Earn unlimited 3X points on the things that really add up - like restaurants, travel, gas stations, transit, popular streaming services, and phone plans. Plus, earn 1X points on other purchases.
- $0 annual fee.
- 0% intro APR for 12 months from account opening on purchases. 19.24%, 24.24%, or 29.24% variable APR thereafter.
- Up to $600 of cell phone protection against damage or theft. Subject to a $25 deductible.
- Redeem your rewards points for travel, gift cards, or statement credits. Or shop at millions of online stores and redeem your rewards when you check out with PayPal.
- Find tickets to top sports and entertainment events, book travel, make dinner reservations and more with your complimentary 24/7 Visa Signature® Concierge.
Earn 100,000 points + a $500 Chase Travel℠ credit when you spend $5,000 in 3 months — this is Sapphire Reserve’s best-ever bonus!
Good/Excellent (670-850)
Intro APR
Purchases: N/A
Balance Transfers: N/A
Regular APR
20.24% - 28.74% Variable
Rewards Earn 8x points on all purchases through Chase Travel℠, including The Edit℠ and 4x points on flights and hotels booked direct. Plus, earn 3x points on dining worldwide & 1x points on all other purchases
8x points on Chase Travel℠, 4x points on flights and hotels booked direct, 3x points on dining, 1x points on all other purchases
Annual Fee
$795
Welcome Offer Earn 100,000 bonus points + $500 Chase Travel℠ promo credit after you spend $5,000 on purchases in the first 3 months from account opening.
100,000 bonus points + $500 Chase Travel℠ promo credit
-
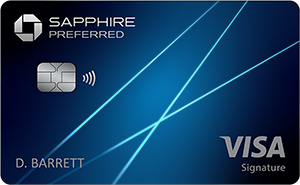
All the perks we've come to expect from a top travel card, including a $300 annual travel credit, airport lounge access, and big bonuses on travel and dining. Points are transferable to airline and hotel partners or worth up to 2x if you book through Chase Travel℠. The annual fee is hefty, but if you can use all its features, this card could be well worth the cost.
Read Full Review -
- Travel credits
- Airport lounge access
- Travel and dining rewards
- Welcome offer
- Flexible travel points
- Annual fee
- Limited-time benefits
-
- Earn 100,000 bonus points + $500 Chase Travel℠ promo credit after you spend $5,000 on purchases in the first 3 months from account opening.
- Get more than $2,700 in annual value with Sapphire Reserve.
- Earn 8x points on all purchases through Chase Travel℠, including The Edit℠ and 4x points on flights and hotels booked direct. Plus, earn 3x points on dining worldwide & 1x points on all other purchases
- $300 annual travel credit as reimbursement for travel purchases charged to your card each account anniversary year.
- Access over 1,300 airport lounges worldwide with a complimentary Priority Pass™ Select membership, plus every Chase Sapphire Lounge® by The Club with two guests. Plus, up to $120 towards Global Entry, NEXUS, or TSA PreCheck® every 4 years
- Get up to $150 in statement credits every six months for a maximum of $300 annually for dining at restaurants that are part of Sapphire Reserve Exclusive Tables.
- Count on Trip Cancellation/Interruption Insurance, Auto Rental Coverage, Lost Luggage Insurance, no foreign transaction fees, and more.
- Get complimentary Apple TV+, the exclusive streaming home of Apple Originals. Plus Apple Music - all the music you love, across all your devices. Subscriptions run through 6/22/27 - a value of $250 annually
- Member FDIC
On American Express' Secure Website.
Terms apply
On American Express' Secure Website.
Terms apply
Good/Excellent (670-850)
Intro APR
Purchases: N/A
Balance Transfers: N/A
APR
20.24%-29.24% Variable
Rewards Earn 2X Miles on Delta purchases, at U.S. Supermarkets and at restaurants worldwide, including takeout and delivery in the U.S. Earn 1X Mile on all other eligible purchases.
1X-2X Miles
Annual Fee
$0 introductory annual fee for the first year, then $150.
Welcome Offer Earn 80,000 Bonus Miles after you spend $3,000 in eligible purchases on your new Card in your first 6 months of Card Membership.
80,000
-
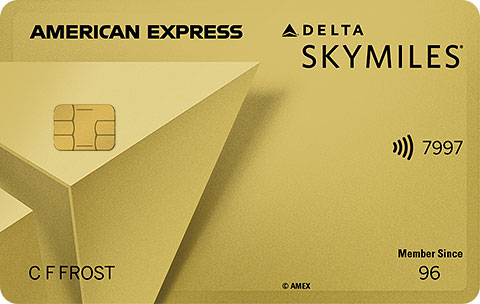
A budget-friendly option for earning Delta miles. The benefits easily outweigh the annual fee if you fly with Delta regularly.
-
- Welcome offer
- Free checked bag
- Priority boarding
- Earn a Flight Credit
- Annual fee
- No premium travel benefits
-
- Earn 80,000 Bonus Miles after you spend $3,000 in eligible purchases on your new Card in your first 6 months of Card Membership.
- Enjoy a $0 introductory Annual Fee for the first year, then $150.
- Delta SkyMiles® Gold American Express Card Members get 15% off when using miles to book Award Travel on Delta flights through delta.com and the Fly Delta app. Discount not applicable to partner-operated flights or to taxes and fees.
- $200 Delta Flight Credit: After you spend $10,000 in purchases on your Card in a calendar year, you can receive a $200 Delta Flight Credit to use toward future travel.
- Earn 2X Miles on Delta purchases, at U.S. Supermarkets and at restaurants worldwide, including takeout and delivery in the U.S. Earn 1X Miles on all other eligible purchases.
- You can check your first bag free on Delta flights, saving up to $70 on a round-trip Delta flight per person. For a family of four that’s a potential savings of up to $280 per round-trip flight.
- Receive Zone 5 Priority Boarding on Delta flights; board early, stow your carry-on bag and settle in sooner.
- $100 Delta Stays Credit: Get up to $100 back per year as a statement credit after using your Delta SkyMiles® Gold American Express Card to book prepaid hotels or vacation rentals through Delta Stays on delta.com.
- Take up to $50 off the cost of your flight for every 5,000 miles you redeem with Pay with Miles when you book on delta.com.
- Receive a 20% savings in the form of a statement credit on eligible Delta in-flight purchases after using your Card.
- No Foreign Transaction Fees.
- With Send & Split®, you can send money and split your Card purchases with any other Venmo or PayPal user, directly from the Amex App. Enroll today.
- Apply with confidence. Know if you're approved for a Card with no impact to your credit score. If you're approved and you choose to accept this Card, your credit score may be impacted.
- Terms Apply.
IHG One Rewards Premier Credit Card
Good/Excellent (670-850)
Intro APR
Purchases: N/A
Balance Transfers: N/A
Regular APR
19.99% - 28.49% Variable
Rewards Earn up to 26 total points per $1 spent when you stay at IHG Hotels & Resorts. Earn 5 points per $1 spent on purchases on travel, at gas stations, and restaurants. Earn 3 points per $1 spent on all other purchases.
N/A
Annual Fee
$99
Welcome Offer Earn 140,000 Bonus Points after spending $3,000 on purchases in the first 3 months from account opening
Earn 140,000 Bonus Points
-
This card has a very lucrative bonus you can earn after opening an account, and allows you to rack up tons of point on hotel stays.
-
- Big sign-up bonus
- Free night award
- Automatic elite status
- Bonus IHG® rewards
- No foreign transaction fee
- Annual fee
-
- Earn 140,000 Bonus Points
- Enjoy an Anniversary Free Night at IHG Hotels & Resorts. Plus, enjoy a fourth reward night free when you redeem points for a consecutive four-night IHG® hotel stay.
- Earn up to 26 total points per $1 spent when you stay at IHG Hotels & Resorts
- Earn 5 points per $1 spent on purchases on travel, at gas stations, and restaurants. Earn 3 points per $1 spent on all other purchases
- Automatic Platinum Elite status as long as you remain a Premier cardmember
- Global Entry, TSA PreCheck® or NEXUS Statement Credit of up to $120 every 4 years as reimbursement for the application fee charged to your card
- IHG One Rewards Bonus points are redeemable at Hotels & Resorts such as InterContinental®, Crowne Plaza®, Kimpton®, EVEN® Hotels, Indigo® Hotels & Holiday Inn®
- Member FDIC
Capital One Spark 2X Miles
Excellent (740-850)
Intro APR
Purchases: N/A
Balance Transfers: N/A
Regular APR
25.74%, variable
Rewards Earn unlimited 2X miles per dollar on every purchase, everywhere, no limits or category restrictions, and miles won't expire for the life of the account. Earn 5X miles on hotel and rental car bookings through Capital One Travel℠ using a Spark Miles card.
2X-5X miles
Annual Fee $0 intro fee for first year; $95 after that
$0 intro fee
Welcome Offer Earn a one-time bonus of 50,000 miles – equal to $500 in travel – once you spend $4,500 on purchases within the first 3 months from account opening
50,000 miles
-
One of the best cards for businesses looking to capitalize on a travel reward for their everyday purchases. With a big sign up bonus, 2x miles, and low fees, it is a great choice for jet-setting small businesses.
-
- Big sign-up bonus
- Unlimited 2x miles
- No foreign transaction fee
- Multiple ways to use miles
- Annual fee
- No intro APR offer
-
- Earn a one-time bonus of 50,000 miles – equal to $500 in travel – once you spend $4,500 on purchases within the first 3 months from account opening
- Earn unlimited 2X miles per dollar on every purchase, everywhere, no limits or category restrictions, and miles won't expire for the life of the account
- Earn 5X miles on hotel and rental car bookings through Capital One Travel℠ using a Spark Miles card
- Transfer your miles to 10+ leading travel loyalty programs like JetBlue™, Air Canada, and Emirates™
- Redeem your miles instantly for any travel-related purchases, from flights and hotels to ride-sharing services
- Fly through security with one statement credit for either the $85 TSA Pre✓® application fee or the $100 Global Entry application fee
- $0 intro annual fee for the first year; $95 after that
- Free employee cards which also earn unlimited 2X miles from their purchases
On Bank of America's Secure Website.
On Bank of America's Secure Website.
Earn 6% cash back in the category of your choice -- like dining, travel, or online shopping -- for the first year. Plus, score a $200 cash rewards bonus after qualifying purchases.
Good/Excellent (670-850)
Intro APR 0% Intro APR for 15 billing cycles for purchases, and for any balance transfers made in the first 60 days. After the Intro APR offer ends, a Variable APR that’s currently 18.24% - 28.24% will apply. A 3% Intro balance transfer fee will apply for the first 60 days your account is open. After the Intro balance transfer fee offer ends, the fee for future balance transfers is 4%. Balance transfers may not be used to pay any account provided by Bank of America.
Purchases: 0% Intro APR for 15 billing cycles for purchases
Balance Transfers: 0% Intro APR for 15 billing cycles for any balance transfers made in the first 60 days
Regular APR
18.24% - 28.24% (Variable)
Rewards Earn 6% cash back for the first year in the category of your choice, 2% cash back at grocery stores and wholesale clubs, and unlimited 1% cash back on all other purchases. Earn 6% and 2% cash back on the first $2,500 in combined purchases each quarter in the choice category, and at grocery stores and wholesale clubs, then earn unlimited 1% thereafter. After the first year from account opening, you’ll earn 3% cash back on purchases in your choice category and 2% cash back at grocery stores and wholesale clubs up to the quarterly maximum.
1% - 6% cash back
Annual Fee
$0
Welcome Offer $200 online cash rewards bonus after you make at least $1,000 in purchases in the first 90 days of account opening.
$200 cash back
-
This card's wide range of extra cash back options speaks for itself, with a choice of six bonus categories you can change monthly for 6% earnings for the first year in the category of your choice. And you can earn 2% back automatically at grocery stores and wholesale clubs. No annual fee and a nice welcome bonus also make this one a winner. Plus, if you're a Bank of America Preferred Rewards member, this card will be even more valuable for you.
Read Full Review -
- Competitive welcome bonus
- Bonus cash back in a category of your choice
- No annual fee
- Great intro & transfer APR offer
- Relationship rewards bonus
- Foreign transaction fee
- Limit on bonus cash back
-
- New offer! Earn 6% cash back for the first year in the category of your choice: gas and EV charging stations; online shopping, including cable, internet, phone plans and streaming; dining; travel; drug stores and pharmacies; or home improvement and furnishings. You’ll automatically earn 2% cash back at grocery stores and wholesale clubs, and unlimited 1% cash back on all other purchases. After the first year from account opening, you’ll earn 3% cash back on purchases in your choice category.
- Earn 6% and 2% cash back on the first $2,500 in combined purchases each quarter in the choice category, and at grocery stores and wholesale clubs, then earn unlimited 1% thereafter. After the 3% first-year bonus offer ends, you will earn 3% and 2% cash back on these purchases up to the quarterly maximum.
- $200 online cash rewards bonus after you make at least $1,000 in purchases in the first 90 days of account opening.
- With the Bank of America Preferred Rewards® program, members can earn 25%-75% more cash back on every purchase. That means the 3% choice category could go up to 3.75%-5.25%. The Preferred Rewards bonus is not applied to the 3% first-year bonus.
- No annual fee and cash rewards don’t expire as long as your account remains open.
- 0% Intro APR for 15 billing cycles for purchases, and for any balance transfers made in the first 60 days. After the Intro APR offer ends, a Variable APR that’s currently 18.24% - 28.24% will apply. A 3% Intro balance transfer fee will apply for the first 60 days your account is open. After the Intro balance transfer fee offer ends, the fee for future balance transfers is 4%. Balance transfers may not be used to pay any account provided by Bank of America.
- Contactless Cards - The security of a chip card, with the convenience of a tap.
- This online only offer may not be available if you leave this page or if you visit a Bank of America financial center. You can take advantage of this offer when you apply now.
Good/Excellent (670-850)
Intro APR 0% intro APR for 12 months from account opening on purchases and qualifying balance transfers
Purchases: 0% intro APR, 12 months from account opening
Balance Transfers: 0% intro APR, 12 months from account opening on qualifying balance transfers
Regular APR
19.24%, 24.24%, or 29.24% Variable APR
Rewards Earn unlimited 2% cash rewards on purchases.
2% cash rewards
Annual Fee
$0
Welcome Offer Earn a $200 cash rewards bonus after spending $500 in purchases in the first 3 months.
$200 cash rewards
-
This card’s unlimited 2% cash rewards on purchases is the highest we’ve seen for a flat-rate rewards card with no annual fee. It also has an incredibly easy-to-earn $200 welcome bonus and a decent intro APR offer. We simply haven’t come across this combination of top perks in one card before.
Read Full Review -
- Unlimited 2% cash rewards
- Long 0% intro APR offer
- Generous cash rewards welcome bonus
- No annual fee
- Cellphone protections
- No bonus categories
- Foreign transaction fees
- Balance transfer fee
-
- Apply Now to take advantage of this offer and learn more about product features, terms and conditions.
- Earn a $200 cash rewards bonus after spending $500 in purchases in the first 3 months.
- Earn unlimited 2% cash rewards on purchases.
- 0% intro APR for 12 months from account opening on purchases and qualifying balance transfers. 19.24%, 24.24%, or 29.24% variable APR thereafter; balance transfers made within 120 days qualify for the intro rate and fee of 3% then a BT fee of up to 5%, min: $5.
- $0 annual fee.
- No categories to track or remember and cash rewards don’t expire as long as your account remains open.
- Find tickets to top sports and entertainment events, book travel, make dinner reservations and more with your complimentary 24/7 Visa Signature® Concierge.
- Up to $600 of cell phone protection against damage or theft. Subject to a $25 deductible.
On American Express' Secure Website.
Terms apply
On American Express' Secure Website.
Terms apply
Good/Excellent (670-850)
Intro APR
Purchases: 0% on purchases, 12 months
Balance Transfers: 0%, 12 months
APR
20.24%-29.24% Variable
Rewards 6% Cash Back at U.S. supermarkets on up to $6,000 per year in purchases (then 1%). 6% Cash Back on select U.S. streaming subscriptions. 3% Cash Back at U.S. gas stations. 3% Cash Back on transit (including taxis/rideshare, parking, tolls, trains, buses and more). 1% Cash Back on other purchases. Cash Back is received in the form of Reward Dollars that can be redeemed as a statement credit or at Amazon.com checkout.
1%-6% Cash Back
Annual Fee
$0 intro annual fee for the first year, then $95.
Welcome Offer Earn a $250 statement credit after you spend $3,000 in eligible purchases on your new Card within the first 6 months.
$250
-
This card is a smart choice for earning top-tier rewards on everyday purchases. It features a market-leading rate of a whopping 6% cash back at U.S. supermarkets (on up to $6,000 per year), 6% on select U.S. streaming services, and 3% on U.S. gas and transit. Plus, there’s a strong welcome offer: Earn a $250 statement credit after spending $3,000 in the first 6 months. With 0% intro APR on purchases and balance transfers for the first 12 months and $0 annual fee for the first year (then $95), it’s one of our favorite credit cards for a reason. Terms apply.
Read Full Review -
- Big welcome offer
- U.S. supermarkets rewards
- U.S. gas stations rewards
- Streaming subscription rewards
- Annual fee
- Foreign transaction fee
-
- Earn a $250 statement credit after you spend $3,000 in eligible purchases on your new Card within the first 6 months.
- $0 intro annual fee for the first year, then $95.
- Buy Now, Pay Later: Enjoy $0 intro plan fees when you use Plan It® to split up large purchases into monthly installments with a fixed fee. Pay $0 intro plan fees on plans created during the first 12 months from the date of account opening. Plans created after that will have a monthly plan fee up to 1.33% of each eligible purchase amount moved into a plan based on the plan duration, the APR that would otherwise apply to the purchase, and other factors.
- Low Intro APR: 0% intro APR on purchases and balance transfers for 12 months from the date of account opening. After that, your APR will be a variable APR of 20.24% - 29.24%.
- 6% Cash Back at U.S. supermarkets on up to $6,000 per year in purchases (then 1%).
- 6% Cash Back on select U.S. streaming subscriptions.
- 3% Cash Back at U.S. gas stations and on transit (including taxis/rideshare, parking, tolls, trains, buses and more).
- 1% Cash Back on other purchases.
- Cash Back is received in the form of Reward Dollars that can be redeemed as a statement credit or at Amazon.com checkout.
- $84 Disney Bundle Credit: With your enrolled Blue Cash Preferred® Card, spend $9.99 or more each month on an auto-renewing Disney Bundle subscription, to receive a monthly statement credit of $7. Valid only at Disney Plus.com, Hulu.com or Plus.espn.com in the U.S.
- Apply with confidence. Know if you're approved for a Card with no impact to your credit score. If you're approved and you choose to accept this Card, your credit score may be impacted.
- Terms Apply.
Good/Excellent (670-850)
Intro APR
Purchases: N/A
Balance Transfers: N/A
APR
See Pay Over Time APR
Rewards • Earn 4X Membership Rewards® points per dollar spent on purchases at restaurants worldwide, on up to $50,000 in purchases per calendar year, then 1X points for the rest of the year. • Earn 4X Membership Rewards® points per dollar spent at US supermarkets, on up to $25,000 in purchases per calendar year, then 1X points for the rest of the year. • Earn 3X Membership Rewards® points per dollar spent on flights booked directly with airlines or on AmexTravel.com. • Earn 2X Membership Rewards® points per dollar spent on prepaid hotels and other eligible purchases booked on AmexTravel.com. • Earn 1X Membership Rewards® point per dollar spent on all other eligible purchases.
1X-4X Membership Rewards® Points
Annual Fee
$325
Welcome Offer You may be eligible for as high as 100,000 Membership Rewards® Points after spending $6,000 in eligible purchases on your new Card in your first 6 months of Membership. Welcome offers vary and you may not be eligible for an offer.
As High As 100,000 points. Find Out Your Offer.
-
This card offers considerable value, as it earns 4X points at U.S. supermarkets (on up to $25,000 in purchases per calendar year, then 1X) and 4X points at restaurants worldwide (on up to $50,000 in purchases per calendar year, then 1X). Plus, earn 3X points on flights booked directly with airlines or on AmexTravel.com. Meanwhile, the value of its annual benefits can potentially offset its entire annual fee. (Terms apply.) Overall, it’s an incredibly lucrative card for those who spend a lot in its bonus categories and can use its spend credits.
Read Full Review -
- Impressive welcome offer
- Restaurant rewards
- U.S. supermarket rewards
- Travel and dining credits
- High-value rewards points
- Annual fee
- Inflexible spending credits
-
- You may be eligible for as high as 100,000 Membership Rewards® Points after you spend $6,000 in eligible purchases on your new Card in your first 6 months of Card Membership. Welcome offers vary and you may not be eligible for an offer. Apply to know if you’re approved and find out your exact welcome offer amount – all with no credit score impact. If you’re approved and choose to accept the Card, your score may be impacted.
- Earn 4X Membership Rewards® points per dollar spent on purchases at restaurants worldwide, on up to $50,000 in purchases per calendar year, then 1X points for the rest of the year.
- Earn 4X Membership Rewards® points per dollar spent at US supermarkets, on up to $25,000 in purchases per calendar year, then 1X points for the rest of the year.
- Earn 3X Membership Rewards® points per dollar spent on flights booked directly with airlines or on AmexTravel.com.
- Earn 2X Membership Rewards® points per dollar spent on prepaid hotels and other eligible purchases booked on AmexTravel.com.
- Earn 1X Membership Rewards® point per dollar spent on all other eligible purchases.
- $120 Uber Cash on Gold: Add your Gold Card to your Uber account and get $10 in Uber Cash each month to use on orders and rides in the U.S. when you select an American Express Card for your transaction. That’s up to $120 Uber Cash annually. Plus, after using your Uber Cash, use your Card to earn 4X Membership Rewards® points for Uber Eats purchases made with restaurants or U.S. supermarkets. Point caps and terms apply.
- $84 Dunkin' Credit: With the $84 Dunkin' Credit, you can earn up to $7 in monthly statement credits after you enroll and pay with the American Express® Gold Card at U.S. Dunkin' locations. Enrollment is required to receive this benefit.
- $100 Resy Credit: Get up to $100 in statement credits each calendar year after you pay with the American Express® Gold Card to dine at U.S. Resy restaurants or make other eligible Resy purchases. That's up to $50 in statement credits semi-annually. Enrollment required.
- $120 Dining Credit: Satisfy your cravings, sweet or savory, with the $120 Dining Credit. Earn up to $10 in statement credits monthly when you pay with the American Express® Gold Card at Grubhub, The Cheesecake Factory, Goldbelly, Wine.com, and Five Guys. Enrollment required.
- Explore over 1,000 upscale hotels worldwide with The Hotel Collection and receive a $100 credit towards eligible charges* with every booking of two nights or more through AmexTravel.com. *Eligible charges vary by property.
- No Foreign Transaction Fees.
- Annual Fee is $325.
- Terms Apply.
Good/Excellent (670-850)
Intro APR 0% intro APR on purchases for 12 months from account opening
Purchases: 0% intro APR, 12 months from account opening
Balance Transfers: N/A
Regular APR
19.24%, 24.24%, or 29.24% Variable APR
Rewards Earn unlimited 3X points on restaurants, travel, gas stations, transit, popular streaming services and phone plans. Plus earn 1X points on other purchases.
1X-3X points
Annual Fee
$0
Welcome Offer Earn 20,000 bonus points when you spend $1,000 in purchases in the first 3 months - that's a $200 cash redemption value.
20,000 bonus points
-
This card offers unlimited 3X points on common things like restaurants, gas stations, travel, transit, popular streaming services, and phone plans. Plus, earn 1X points on other purchases. This could be a great pick if you spend a lot in those categories. A solid welcome bonus and cell phone protection are the cherries on top.
-
- Strong welcome bonus for a no annual fee card
- Earn Unlimited 3x points on useful categories
- Cellphone protection
- Other cards offer larger bonuses, though they usually come with annual fees
- The 1x points baseline rewards rate on other purchases, though normal for this type of card, can be beat
-
- Apply Now to take advantage of this offer and learn more about product features, terms and conditions.
- Earn 20,000 bonus points when you spend $1,000 in purchases in the first 3 months - that's a $200 cash redemption value.
- Earn unlimited 3X points on the things that really add up - like restaurants, travel, gas stations, transit, popular streaming services, and phone plans. Plus, earn 1X points on other purchases.
- $0 annual fee.
- 0% intro APR for 12 months from account opening on purchases. 19.24%, 24.24%, or 29.24% variable APR thereafter.
- Up to $600 of cell phone protection against damage or theft. Subject to a $25 deductible.
- Redeem your rewards points for travel, gift cards, or statement credits. Or shop at millions of online stores and redeem your rewards when you check out with PayPal.
- Find tickets to top sports and entertainment events, book travel, make dinner reservations and more with your complimentary 24/7 Visa Signature® Concierge.
On American Express' Secure Website.
Terms apply
On American Express' Secure Website.
Terms apply
Good/Excellent (670-850)
Intro APR
Purchases: 0% on purchases, 15 months
Balance Transfers: 0%, 15 months
APR
20.24%-29.24% Variable
Rewards 3% Cash Back at U.S. supermarkets on up to $6,000 per year in purchases, then 1%. 3% Cash Back on U.S. online retail purchases, on up to $6,000 per year, then 1%. 3% Cash Back at U.S. gas stations, on up to $6,000 per year, then 1%. Cash Back is received in the form of Reward Dollars that can be redeemed as a statement credit or at Amazon.com checkout.
1%-3% cash back
Annual Fee
$0
Welcome Offer Earn a $200 statement credit after you spend $2,000 in purchases on your new Card within the first 6 months.
$200
-
If gas and groceries are big line items in your budget, don't miss this card. You won't pay an annual fee, and you can earn a generous 3% cash back at U.S. supermarkets, U.S. online retail purchases, and U.S. gas stations, on up to $6,000 per year, per category. A 0% APR intro offer lasting 15 months and a $200 welcome bonus for a $2,000 spend inside of 6 months (terms apply) round out the perks on this Amex.
Read Full Review -
- U.S. supermarkets and online retail rewards
- U.S. gas stations cash back
- Big welcome offer
- No annual fee (see rates and fees)
- Foreign transaction fee
- High spend requirement for welcome offer
-
- Earn a $200 statement credit after you spend $2,000 in purchases on your new Card within the first 6 months.
- No Annual Fee.
- Enjoy 0% intro APR on purchases and balance transfers for 15 months from the date of account opening. After that, 20.24% to 29.24% variable APR.
- 3% Cash Back at U.S. supermarkets on up to $6,000 per year in purchases, then 1%.
- 3% Cash Back on U.S. online retail purchases, on up to $6,000 per year, then 1%.
- 3% Cash Back at U.S. gas stations, on up to $6,000 per year, then 1%.
- Cash back is received in the form of Reward Dollars that can be redeemed as a statement credit or at Amazon.com checkout.
- Thinking about getting the Disney Bundle which can include Disney+, Hulu, and ESPN+? Your decision made easy with $7/month back in the form of a statement credit after you spend $9.99 or more each month on an eligible subscription (subject to auto renewal) with your Blue Cash Everyday® Card. Enrollment required.
- Apply with confidence. Know if you're approved for a Card with no impact to your credit score. If you're approved and you choose to accept this Card, your credit score may be impacted.
- Terms Apply.
Good/Excellent (670-850)
Intro APR
Purchases: N/A
Balance Transfers: N/A
Regular APR
20.24% - 28.24% (Variable)
Rewards • Earn 10 Points per $1 spent on Hotels, Car Rentals, and Attractions booked on CitiTravel.com. • Earn 3 Points per $1 on Air Travel and Other Hotel Purchases, at Restaurants, Supermarkets, Gas and EV Charging Stations. • Earn 1 Point per $1 spent on all other purchases
1x - 10x points
Annual Fee
$95
Welcome Offer Earn 60,000 bonus ThankYou® Points after spending $4,000 in the first 3 months of account opening, redeemable for $600 in gift cards or travel rewards at thankyou.com.
60,000 ThankYou® Points
-
Citi Strata Premier offers a unique combination of bonus categories we don't see on many travel cards. It earns 3X points on travel and everyday-type categories, including supermarkets and gas/EV charging. You can also earn a welcome bonus worth $600. That combination of rewards is an excellent value for a relatively low annual fee. Plus, if you run into any problems on a trip, its complimentary travel protections (including coverage for trip delays, trip cancellations and interruptions, and lost/damaged luggage) could save the day.
-
- Big sign-up bonus
- Annual hotel savings offer
- Travel and dining rewards
- Grocery and gas rewards
- Flexible travel rewards points
- Travel insurance protections
- Annual fee
- Redemption options
-
- Earn 60,000 bonus ThankYou® Points after spending $4,000 in the first 3 months of account opening, redeemable for $600 in gift cards or travel rewards at thankyou.com.
- Earn 10 Points per $1 spent on Hotels, Car Rentals, and Attractions booked on CitiTravel.com.
- Earn 3 Points per $1 on Air Travel and Other Hotel Purchases, at Restaurants, Supermarkets, Gas and EV Charging Stations.
- Earn 1 Point per $1 spent on all other purchases
- $100 Annual Hotel Benefit: Once per calendar year, enjoy $100 off a single hotel stay of $500 or more (excluding taxes and fees) when booked through CitiTravel.com. Benefit applied instantly at time of booking.
- No expiration and no limit to the amount of points you can earn with this card
- No Foreign Transaction Fees on purchases
At Motley Fool Money, we rate credit cards on a five-star scale (1 = poor, 5 = best). Our rating criteria includes rewards rates and 0% intro APR offers, welcome bonuses, fees, and perks like travel credits and purchase protections.
Our highest-rated credit cards have:
- High value through rewards or 0% intro APR offers
- Attainable welcome bonuses that make up for any annual fees
- Low annual fees or a balance transfer fee of 3%
- Top perks such as purchase and travel protections, no foreign transaction fees, travel credits, and status upgrades
We combine these factors with an evaluation of brand reputation and customer satisfaction to ensure you're getting the best credit card recommendations. Our aim is to maintain a balanced best-of list featuring top-scoring credit cards from reputable brands. 'Best for' category selections on this page are determined by our editors, and a single card may be recognized in multiple categories.
Ordering within lists is influenced by advertiser compensation, including featured placements at the top of a given list, but our product recommendations are NEVER influenced by advertisers. Learn more about how Motley Fool Money rates credit cards.
Explore the best credit cards by category

At The Motley Fool, we've spent 30 years demystifying investing and making it easier for people all over the world. At Motley Fool Money, we do the same for credit cards and your personal finances.
I've been part of The Motley Fool since 2006, helping our readers make more and save more through investing and their personal finances. I get excited about what most others find dreadfully boring. Specifically, when a credit card says "terms apply," I'm actually reading those terms. All of them. I've been juggling multiple credit cards for decades to maximize rewards, and I've held credit cards on multiple continents.
Of the cards we list on this page, I personally currently use or have in the past used some of them (many of my teammates at Motley Fool Money use the others we list).
How to compare credit cards
- Figure out the features that are most important to you. This will depend on the type of card you're choosing. Let's say you need a balance transfer card. The features to look at would be the length of each card's balance transfer offer and its balance transfer fees.
- Check for any annual fees on the cards you're comparing. If you're stuck between two credit cards that work for you, one of them may have a cheaper annual fee.
- Use secondary features as your tiebreaker. These are the features that aren't quite as important but still have value. Secondary features could include sign-up bonuses or a FICO® Score for free.
- Read the fine print. All credit cards display common card features in a standardized format. Keep an eye out for the following fees and compare them to other cards: balance transfer, cash advance, late payment, and foreign transaction.
Do you need a credit card?
Although a credit card isn't a necessity, there are several ways it can help you financially. Our credit card guide could help you learn these important things:
- Improving credit: The best credit cards can help you build or rebuild your credit. When you use your credit card and pay the bill on time, your credit score will go up. This can help you qualify for financing, such as a car loan or mortgage, at a low interest rate.
- Earning rewards: With rewards credit cards, you can earn cash back or travel points on purchases.
- Fraud protection: Legally, you're only liable for up to $50 in losses if your credit card is used fraudulently. But most credit card companies go even further. Many credit cards offer zero-liability policies -- meaning you aren't responsible for any fraudulent charges. You also don't need to worry about a thief draining your bank account through your credit card (which could happen if your debit card was stolen).
- Extra perks and discounts: Credit cards can offer all kinds of benefits, such as extended warranty coverage on purchases or complimentary rental car insurance. Many of the best credit cards of 2024 have features that can be worth hundreds of dollars or more.
When should I have one credit card?
You should stick to one credit card if:
- You want to keep your finances as simple as possible.
- You've never had a credit card before, or you've been using credit cards for less than a year.
- You've had problems with missed credit card payments or overspending.
- You value simplicity in managing your finances and don't want to worry about tracking multiple bills.
When should I have multiple credit cards?
You should carry multiple credit cards if you want more card benefits and you're confident in your ability to manage everything. There are some big advantages to having multiple cards:
- You can carry cards that earn more in different areas, such as one flat-rate cash back card and another with bonus categories. This is a simple way to maximize your rewards.
- You can use features from each of your cards and get more value overall. Instead of choosing between two of the best credit card offers, you can have both.
- You'll have more available credit, which helps you maintain a lower credit utilization ratio. This can result in a higher credit score.
How to improve your credit score
Your credit score plays a large role in which credit cards you can get. If you have a low credit score and you work on raising it, that will open up more credit card options for you.
Here's the best advice you can follow to improve your credit score.
Review your credit report
You're legally entitled to a free annual credit report from each credit bureau (Equifax, Experian, and TransUnion). Go to AnnualCreditReport.com to request it.
Once you have your credit reports, review them for errors that could be damaging your credit score. If you find any errors, visit the website of the credit bureau that issued the report to file a dispute.
Get a credit card
The easiest way to improve your credit is by using a credit card and paying the bill on time. If you don't have a credit card, look for the top credit cards aimed at consumers in your position.
If you don't have much credit history yet, the best credit cards for beginners would be ideal. If you're rebuilding credit from issues on your credit history, then secured credit cards are the most suitable option.
Stay below 30% of your credit limit
The amount of your credit that you use impacts your credit score. Say you have a card with a $1,000 credit limit. If the balance is $500, that would put your credit utilization ratio at 50%.
A lower credit utilization helps your credit score. As a rule of thumb, aim to stay under 30% credit utilization at all times. It's good for your credit, and as an added perk, it helps you stay out of credit card debt.
Follow good payment habits
Learn your credit card's due date and always make your payment on time or early. Each on-time payment improves your payment history, which is the biggest factor in your credit score. You may want to set automatic payments so you don't miss any.
It's also recommended that you pay off your credit card every month. While this isn't necessary for your credit score, it's a way to avoid interest charges on your credit card purchases.
Important card terms to know
- Annual percentage rate (APR): The annual percentage rate is charged for carrying a balance on a credit card, expressed as an annual percentage. With credit cards, the APR is the same as the interest rate.
- Balance: The amount owed on a credit card, including all unpaid transactions and fees. The balance at the end of a statement period is called the statement balance.
- Balance transfer: Moving a balance from one credit card to another. This is usually done when the new card offers a lower APR. Not every credit card offers balance transfers, and many of the cards with this feature charge a balance transfer fee.
- Cash advance: Withdrawing cash from a credit card, most often through cash advance checks, using the card at an ATM, or by wiring money with the card. Cash advances usually have a higher APR and start accruing interest immediately, so it's a poor way to use a credit card.
- Credit card: A credit card is a revolving line of credit issued by a bank and connected to a revolving line of credit. The cardholder can use their credit card for purchases and possibly other types of transactions, although this depends on the card.
- Credit limit: The credit card's spending limit. This can vary based on the type of transaction. On credit cards that offer cash advances, there is typically a lower credit limit for cash advances than for purchases. A transaction that would exceed a card's credit limit will be declined unless the cardholder has opted to allow over-the-limit transactions (and any potential fees that come with them).
- Credit score: A credit score is a rating of a consumer's creditworthiness. The score indicates how likely it is that they will make bill payments on time and repay what they borrow. Credit scores are calculated based on the consumer's financial history.
- Interest: A fee charged for borrowing money. The APR determines how much interest a credit card company can charge on balances. Use our interest rate calculator to get a sense of how much interest adds to your monthly bill.
- Minimum payment: The minimum amount a cardholder can pay by the due date to remain current on their credit card bill and avoid a late fee.
We're firm believers in the Golden Rule, which is why editorial opinions are ours alone and have not been previously reviewed, approved, or endorsed by included advertisers. Motley Fool Money does not cover all offers on the market. Motley Fool Money is 100% owned and operated by The Motley Fool. Our knowledgeable team of personal finance editors and analysts are employed by The Motley Fool and held to the same set of publishing standards and editorial integrity while maintaining professional separation from the analysts and editors on other Motley Fool brands. Terms may apply to offers listed on this page.
For rates and fees for the American Express® Gold Card, click here
For rates and fees for the Blue Cash Everyday® Card from American Express, click here
For rates and fees for the Blue Cash Preferred® Card from American Express, click here
For rates and fees for the Delta SkyMiles® Gold American Express Card, click here
For rates and fees for the The Platinum Card® from American Express, click here
